A burglar spends less than 10 minutes inside a home. Most target properties with no visible cameras. Outdoor cameras are one of the fastest and most proven ways to reduce that risk. You do not need a professional for every setup, but you do need to do it right.
Learning how to install security cameras outside is easier than most people think. This guide walks you through everything, from picking the right spot to running cables and testing your footage, so your system works from day one.
Why Install Outdoor Security Cameras?

Outdoor cameras do more than record crime. They stop it before it starts.
Studies show that homes with visible cameras are up to 300% less likely to be targeted. Burglars look for easy opportunities. A camera above your front door or garage sends a clear message that your home is not one of them.
Beyond deterrence, outdoor cameras give you real evidence. License plates, faces, timestamps. That footage is what helps police solve cases and insurance companies process claims.
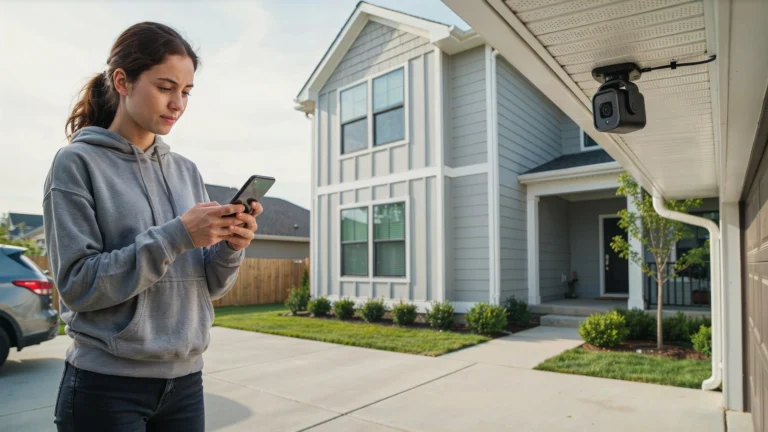
They also give you peace of mind. At Cam Security Surveillance, we know that checking your property from your phone at any time changes how you feel about leaving home. Whether you are at work or traveling, your cameras are always watching so you do not have to worry.
Things to Consider Before Installing Outdoor Security Cameras
Before you drill a single hole, think through these key factors.
Wired or wireless? Wired cameras are more reliable and cannot be jammed. Wireless cameras are easier to install and reposition. For permanent outdoor spots, wired is the stronger choice.
Power source. Wired cameras need access to an outlet or a dedicated circuit. Solar-powered and battery cameras work where running cables is not practical, but they need regular maintenance.
Internet connection. Wireless cameras need a strong Wi-Fi signal. Test signal strength at your planned camera locations before buying. Weak signals cause dropped footage and delayed alerts.
Storage. Decide between cloud storage, local storage via an NVR or SD card, or both. Cloud gives you remote access. Local storage keeps your footage private with no monthly fees.
Weather resistance. Look for cameras rated IP65 or higher. This rating means the camera can handle rain, dust, and temperature changes without failing.
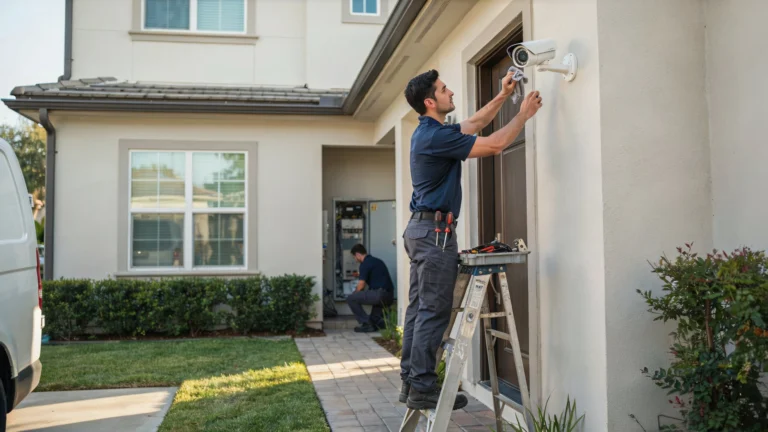
Professional vs. DIY. Some setups are genuinely complex. Long cable runs, multi-camera systems, or older homes with no easy access to walls can make DIY frustrating. If you are in Indiana, Cam Security Surveillance offers professional security camera installation in Indianapolis that handles the hard parts for you, from planning to final testing.
Tools and Equipment You’ll Need
Having the right tools saves time and prevents damage.
For the installation:
- Power drill with masonry and wood bits
- Screwdriver set
- Fish tape or cable snake (for running cables through walls)
- Wire staples or cable clips
- Voltage tester
- Ladder
- Silicone sealant
- Painter’s tape (for marking positions before drilling)
For the camera system:
- Outdoor security cameras (wired or wireless)
- NVR or DVR (for wired systems)
- Ethernet or coaxial cables (for wired systems)
- Weatherproof cable covers
- Mounting brackets (usually included with cameras)
- Surge protector
Always have a helper for outdoor installations. Holding a camera against a wall while also checking your phone app is nearly impossible alone.
Best Places to Install Outdoor Security Cameras
Location decides whether your system works or wastes money.
Front door. Over a third of break-ins happen at the front door. This is always your first camera. Mount it 8 to 10 feet high, angled to capture faces clearly.
Back door. The second most targeted entry point. Hidden from street view, which makes it more attractive to intruders.
Garage. Cover both the garage door and the interior entry door if your garage connects to the house.
Driveway. A camera here captures vehicles and license plates. Position it to get a clean angle on plates without shooting directly into sunlight.
Side gates and fences. Any access point around the perimeter of your yard is worth covering.
Backyard. One wide-angle camera covering the full yard works for most homes. Larger properties may need two.
Avoid pointing cameras at neighbors’ property, public sidewalks at close range, or any area where privacy expectations exist. More on that in the legal section below.
Step-by-Step Guide to Installing Outdoor Security Cameras
This is the core of how to install security cameras outside. Follow each step carefully.
Step 1: Plan Your Camera Layout
Sketch a rough map of your property. Mark every entry point and coverage zone. Decide how many cameras you need and where each one goes. This prevents buying the wrong number of cameras and avoids major repositioning later.
Step 2: Choose Your Mounting Surface
Most cameras mount to wood siding, brick, stucco, or soffit. Each surface needs a different drill bit. Wood needs a standard wood bit. Brick and stucco need a masonry bit. Soffit needs a bit of plastic anchors.
Step 3: Mark Your Drill Points
Hold the mounting bracket against the wall at your chosen height. Use painter’s tape or a pencil to mark the screw holes. Double-check the angle by looking at the live feed on your phone before drilling.
Step 4: Drill and Mount the Bracket
Drill your holes. Insert wall anchors if mounting to masonry. Attach the bracket firmly. Give it a tug before hanging the camera. It should not move.
Step 5: Run Your Cables (Wired Systems)
This is the most time-consuming part of outdoor surveillance camera installation. Plan a cable route from the camera location to your NVR or router. Use a fish tape to pull cables through walls. Where cables run along exterior surfaces, use weatherproof cable covers or conduit to protect them.
Seal any holes you drill through exterior walls with silicone sealant. This keeps moisture and pests out.
Step 6: Connect and Power the Camera
Plug the cable into the camera and the other end into your NVR or router. For PoE (Power over Ethernet) cameras, one cable handles both data and power. For traditional coaxial systems, you will have a separate power cable.
For wireless cameras, simply mount the unit and connect it to your Wi-Fi network through the camera’s app.
Step 7: Configure Your Camera Settings
Open the camera’s app or NVR software. Set your motion detection zones, alert preferences, and recording schedule. Label each camera by location so your footage is easy to review later.
Step 8: Test Everything
Walk through each camera’s field of view. Check the live feed on your phone. Trigger a motion alert intentionally and confirm you receive the notification. Review a short clip to check image quality and night vision.
Adjust the angle if needed before the mount fully sets.
Tips for Proper Camera Positioning
Getting the angle right is half the job when installing security cameras outside your home.
Avoid backlighting. Do not point cameras directly at the rising or setting sun. The glare will wash out your image during the most active hours of the day.
Capture faces, not foreheads. Tilt the camera slightly downward from the 8 to 10 foot mount height. This gives you face-level footage rather than a view of people’s hair.
Use wide-angle lenses for open areas. A 130 to 160 degree field of view covers driveways and yards without needing multiple cameras.
Test at night. Most crimes happen after dark. Check your night vision footage before finalizing the position. Infrared glare from nearby walls can ruin nighttime image quality.
Overlap coverage zones. Where possible, have two cameras watching the same area from different angles. If one gets tampered with, the other still records.
Common Mistakes to Avoid
Even careful installers make these errors.
Mounting too high. Cameras above 12 feet lose facial detail. Stay within 8 to 10 feet.
Skipping cable sealing. Any hole through an exterior wall that is not sealed will let in water over time. This damages your walls and can cause camera connection failures.
Using indoor cameras outside. Indoor cameras are not built for temperature swings, rain, or direct sun. They will fail quickly outdoors. Always use cameras rated for outdoor use.
Not testing motion zones. Default motion settings often trigger on passing cars, tree branches, or animals. Set custom zones to filter out noise and only alert you to real threats.
Forgetting firmware updates. Outdated firmware leaves your cameras open to security vulnerabilities. Enable automatic updates or check manually every few months.
Relying on Wi-Fi without testing signal strength first. A camera that drops connection constantly is useless. Always verify signal strength at the exact mount location before installation.
Outdoor Security Camera Maintenance Tips
A system you ignore will fail when you need it most.
Clean lenses monthly. Dust, spiderwebs, and water spots blur footage. Wipe lenses with a soft, dry cloth.
Check angles after storms. Wind shifts cameras. Verify your coverage zones after any significant weather.
Inspect cables and mounts. Look for fraying cables, rust on brackets, or loose screws. Fix small issues before they become bigger ones.
Review storage health. Check that recordings are saving correctly. SD cards and hard drives fail over time. Replace them before they cause data loss.
Test your alerts. Walk through each camera’s field of view once a month and confirm alerts are working. App updates sometimes reset notification settings.
Legal and Privacy Considerations
How to install CCTV cameras outside legally requires knowing a few basic rules.
In most U.S. states, you can record video on your own property without notifying anyone. Audio recording is different. Many states require consent from all parties before recording audio. Check your state’s laws before enabling microphones on outdoor cameras. Do not angle cameras to capture a neighbor’s private yard, windows, or interior spaces. Even accidental coverage of a neighbor’s property can lead to disputes or legal claims.
If you live in an HOA community, check the rules before installing. Some associations restrict visible cameras on home exteriors or require approval before installation. Visible cameras in shared spaces like driveways that border neighboring properties are generally acceptable. When in doubt, disclose camera locations to neighbors. It builds goodwill and often prevents complaints.
Conclusion
How to install security cameras outside is a project most homeowners can handle with the right preparation. Start with a clear plan, pick the right locations, use proper tools, and test your system thoroughly before calling it done.
The cameras you install today protect your home, your family, and everything inside it. A few hours of careful work now can prevent a break-in that takes far more to recover from.
If the process feels overwhelming or your property needs a more complex setup, Cam Security Surveillance provides expert outdoor camera installation with free consultations. Contact us and get a system built right the first time.
FAQs
Can I install outdoor security cameras myself?
Yes. Most wireless cameras are designed for DIY installation. Wired systems are more complex and may need a professional for cable runs and NVR setup.
How high should outdoor security cameras be mounted?
Mount cameras between 8 and 10 feet off the ground. This height keeps them out of easy reach and still captures clear facial detail.
Do outdoor security cameras work in the rain?
Yes, if they are rated IP65 or higher. Always check the weather resistance rating before buying cameras for outdoor use.
How do I run cables for outdoor security cameras?
Use a fish tape to pull cables through walls. Protect exterior cable runs with weatherproof conduit or cable covers. Seal all wall penetrations with silicone sealant.
What is the best outdoor surveillance camera installation method for renters?
Wireless cameras with no-drill mounts are the best option for renters. Some models use adhesive brackets or clamp onto gutters and railings without permanent damage.
How many outdoor cameras does a typical home need?
Most homes need 4 to 6 outdoor cameras for solid coverage. Larger properties or homes with multiple outbuildings may need more.
Do outdoor cameras deter burglars?
Yes. Visible cameras are a proven deterrent. Pair them with motion-activated lights for even stronger results.