A weak WiFi signal can break your security system. Cameras freeze, drop offline, or miss recordings. This guide fixes that problem with a simple setup method. It shows how to extend your network without losing camera stability. Many users struggle with weak coverage in corners of homes or offices. The solution is simple when done right.
This guide explains How to Connect WiFi Extender to IP Camera Network in a clear and practical way. You will learn setup steps, placement rules, and common mistakes to avoid.
What is an IP Camera Network?
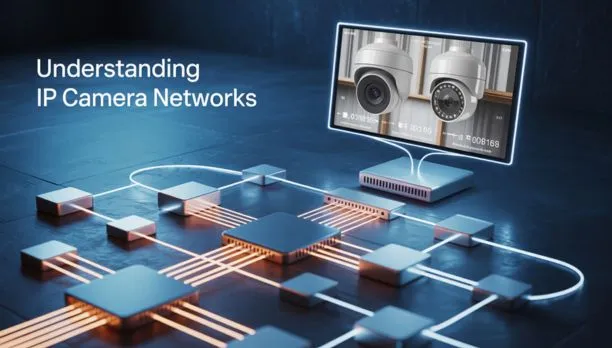
An IP camera network is a system where cameras send video through the internet or local WiFi. These cameras connect to a router, switch, or network video recorder. Unlike old CCTV systems, IP cameras depend on stable internet. If the network drops, the video feed also drops.
In real installations like security camera installation indianapolis, professionals from Cam Security Surveillance design camera networks that focus on strong signal coverage and stable routing. This helps avoid downtime in critical areas like entrances, parking zones, and storage rooms.
A proper IP camera network includes:
- Cameras with IP support
- A router or switch
- Stable WiFi or wired connection
- Storage system like NVR or cloud
Weak WiFi breaks this flow and causes gaps in recording.
What is a WiFi Extender?
A WiFi extender is a device that boosts your existing WiFi signal. It takes the main router signal and rebroadcasts it to weak areas. It does not create a new internet line. It simply extends coverage, which is often used in wifi installation services to improve network reach and stability in homes and offices.
There are different names users search for:
- wifi extender ip
- wifi extender for cameras
- signal repeater
All serve the same goal: better coverage. A WiFi extender helps when cameras sit far from the router or behind thick walls.
Why Use a WiFi Extender for IP Cameras?
IP cameras need stable signals. A weak connection leads to:
- Lag in live view
- Missing footage
- Offline camera alerts
- Poor recording quality
A WiFi extender fixes these problems in many cases.
This is why users often search for an ip camera to wifi solutions when setting up home or office security.
A good extender helps:
- Expand camera range
- Reduce signal drops
- Improve live streaming stability
- Support multiple cameras
It is a low-cost fix before upgrading to full mesh systems or wired setups.
Things to Check Before Setup
Before learning How to Connect WiFi Extender to IP Camera Network, check a few important things:
1. Camera Frequency
Most IP cameras run on 2.4GHz WiFi because it travels farther through walls and floors. It gives better range than 5GHz, which is faster but short range. Before setup, confirm your camera supports 2.4GHz for stable connection.
2. Router Strength
Your main router must already deliver a stable and consistent signal. A WiFi extender only repeats what it receives. If the base signal is weak, the extended network will also be weak. Always test router speed near the camera area before adding any extender.
3. Extender Compatibility
Not all extenders work well with security cameras. Some low-quality devices struggle with constant video streaming. Choose an extender that supports stable bandwidth and multiple connections. This helps avoid lag, disconnection, or frozen video feeds during monitoring.
4. Placement Plan
Plan your layout before installing anything. Check where cameras are installed and where the signal drops happen. The extender should sit between the router and weak signal zones. Good placement directly improves performance and reduces connection issues.
5. Password and Security
Keep all network details ready before setup, including WiFi name and password. Use strong passwords to prevent unauthorized access. A secure network protects your camera feed from intrusion and keeps your system safe at all times.
Step-by-Step Guide: Connecting WiFi Extender to IP Camera Network
This is the core part of How to Connect WiFi Extender to IP Camera Network.
Step 1: Plug in the WiFi Extender
Start by placing the WiFi extender close to your main router. This helps it capture a strong signal during setup. Plug it into a power outlet and turn it on. Wait a few moments until the indicator lights become stable. This shows the device is ready for configuration. Do not place it near walls or metal objects at this stage.
Step 2: Connect to Extender Setup
Use your phone or laptop to begin setup. Search for the extender’s default network name in WiFi settings. Connect to it. Then open the setup page using the provided IP address or app. Log in with the default credentials written on the device or manual. This step gives you access to control settings.
Step 3: Link to Main WiFi
Inside the setup panel, choose your home WiFi network. This is the main internet source. Enter the correct password and confirm the connection. Once linked, the extender will start repeating your main signal. Wait for confirmation that the connection is successful and stable.
Step 4: Place Extender Properly
Now move the extender to its final location. The best position is halfway between your router and the camera area. This ensures balanced signal strength on both sides. Avoid corners, thick walls, and hidden spots. A good position directly improves camera performance and reduces lag.
Step 5: Connect IP Camera
Go to your camera settings menu and start ip camera wifi setup mode. Select the extended WiFi network name from the list. Enter the password you used during setup. Wait for the camera to connect. This step completes the link between your camera and extended network.
Step 6: Test Camera Feed
Open the live view on your app or recorder. Check video quality and stability. Make sure there is no delay or freezing. Move slightly closer or adjust the extender position if needed. A stable feed confirms that How to Connect WiFi Extender to IP Camera Network was done correctly.
If the signal drops, adjust the extender position slightly.
Best Placement Tips for WiFi Extender
Placement matters more than device brand.
Follow these rules:
- Place it mid-point between router and camera
- Keep it away from thick walls
- Avoid metal objects
- Do not place inside cabinets
- Keep it elevated
A poor location will reduce performance even with a strong extender.
Common Issues and Fixes
Camera Not Connecting
If the camera does not connect, start with the basics. Recheck the WiFi password and make sure it is entered correctly. A small typing error can block connection. Also confirm the camera is set to the right WiFi band, usually 2.4GHz. Restart both the camera and WiFi extender after making changes. This refresh helps clear temporary setup errors and allows a fresh connection attempt.
Weak Video Feed
If the video looks slow, blurry, or keeps freezing, the signal is not strong enough. The most common fix is to move the WiFi extender closer to the camera area. Even a small shift in placement can improve performance. Avoid placing the extender behind walls or inside closed spaces, as this weakens the signal.
Frequent Disconnects
If the camera keeps going offline, interference is likely the issue. Devices like microwaves, cordless phones, and Bluetooth speakers can disturb WiFi signals. Try moving the extender away from these devices. You can also reduce network load by limiting other heavy internet usage during camera operation.
Wrong Network Selected
Sometimes the camera connects to the wrong WiFi name during setup. This happens when multiple networks are available. Go back to settings and reconnect using the correct SSID of the extended network. Double-check the network name before saving changes to avoid repeated connection failures.
Alternative Solutions (When Extender is Not Enough)
Sometimes a WiFi extender is not enough for full coverage.
Better options include:
- Mesh WiFi systems
- Powerline adapters
- Direct Ethernet connection
- Hybrid wired + wireless setup
For large properties, professionals often avoid extenders completely and use wired systems for stability.
Security Best Practices
Security matters in camera networks.
Follow these rules:
- Change default passwords
- Use WPA2 or WPA3 encryption
- Update camera firmware regularly
- Keep extender firmware updated
- Separate guest and camera networks
Weak security can expose your video feed to risk.
When to Call a Professional Installer
DIY setup works for small homes. But larger systems need expert help.
Call a professional if:
- You have multiple cameras
- Signal drops keep happening
- You need outdoor coverage
- You manage business security
Teams like Cam Security Surveillance handle full design, including wifi extender ip planning and camera layout for stable long-term performance.
Conclusion
Learning How to Connect WiFi Extender to IP Camera Network helps fix most home and small office camera issues. It improves coverage without high cost. The key is simple. Strong router signal, correct extender placement, and proper camera setup.
If done right, your system becomes stable and reliable for daily monitoring. For setup help or professional support, feel free to contact us anytime.
FAQs
Can all cameras connect through a WiFi extender?
Most modern IP cameras can connect if they support the same WiFi band, usually 2.4GHz. Older models may face issues depending on compatibility and signal strength.
Does a WiFi extender reduce camera quality?
No, it does not reduce quality. Video quality depends on signal strength and placement, not the extender itself.
What is the best distance for extender placement?
Place the extender halfway between the router and camera area for balanced and stable signal coverage.
Is mesh WiFi better than an extender for cameras?
Yes, mesh WiFi is more stable for larger setups because it provides consistent coverage without drops.
Can I use multiple extenders?
Yes, but too many can slow the network. It’s better to use proper placement or a mesh system.