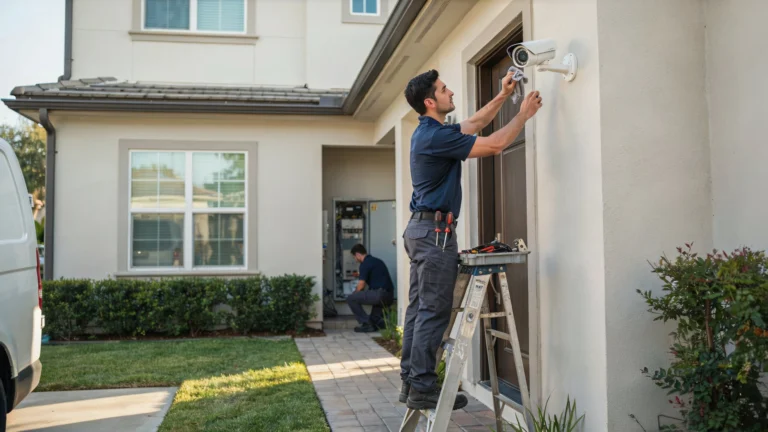
Setting up a security camera feels overwhelming until you realize the process is mostly the same across every brand. You need a stable WiFi signal, the right app, and about 10 minutes. That’s it. Most people get stuck because they skip one small step, not because the technology is hard.
Knowing how to connect the security camera to WiFi correctly the first time saves you from rebooting, reconnecting, and pulling your hair out. This guide walks you through every step in plain language, covers common problems, and helps you get a reliable connection that actually holds.
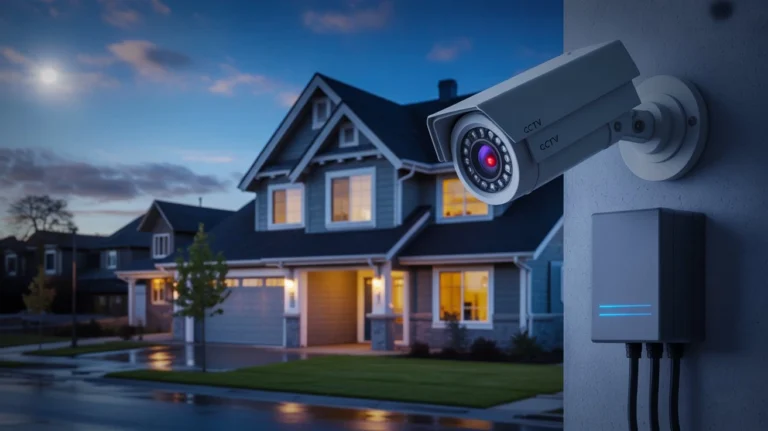
What Is a WiFi Security Camera?
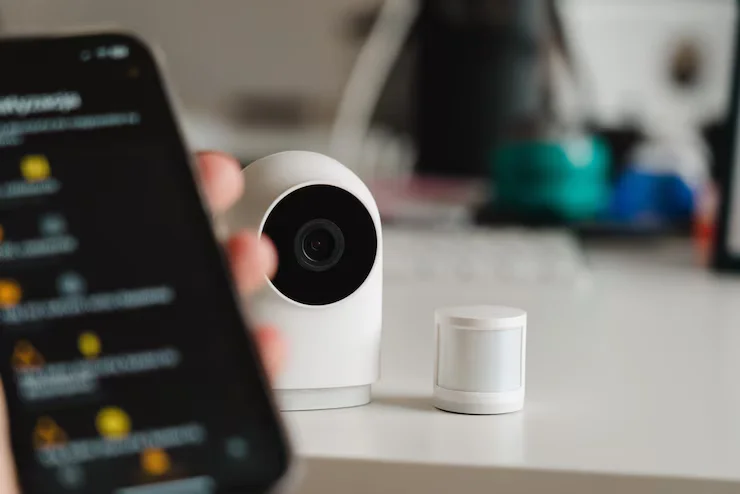
A WiFi security camera is a camera that sends video over your wireless network instead of a physical cable. It connects to your home or business router the same way your phone does. Once connected, you can watch live footage, get motion alerts, and review recordings from anywhere using a smartphone app.
At Cam Security Surveillance, we work with homeowners and businesses every day who want flexible, cable-free setups. If you’re in the Indianapolis area and want a professional to handle the setup for you, our CCTV installation services in Indianapolis cover full WiFi camera installation from start to finish.
WiFi cameras come in two main types:
Battery-powered cameras run on rechargeable batteries. They’re easy to place anywhere but need recharging every few weeks or months.
Plug-in WiFi cameras run on AC power. They stay online consistently and are better for high-traffic areas.
Both types connect to WiFi the same way.
What You Need Before Connecting a Security Camera to WiFi
Before you start, gather these things:
A 2.4GHz or 5GHz WiFi network Most WiFi cameras work on 2.4GHz. Some newer models support 5GHz. Check your camera’s spec sheet. If your router broadcasts both bands under the same name, you may need to separate them temporarily during setup.
Your WiFi password You’ll enter this during setup. Have it ready.
The camera’s app Every brand has its own app. Download it before you open the box. Common apps include Hik-Connect, DMSS, Reolink, Arlo, and Wyze. Check the camera packaging for the correct app name.
A fully charged camera or power source A camera that loses power mid-setup will cause errors. Plug it in or charge it fully first.
A smartphone with Bluetooth enabled Many cameras use Bluetooth during the initial pairing process, even if the final connection is WiFi.
Strong WiFi signal at the camera location Walk to where you plan to mount the camera. Check your phone’s signal bars there. If it’s weak on your phone, it’ll be weak for the camera too.
How to Connect Security Camera to WiFi (Step-by-Step Guide)
This is the general process for most WiFi cameras. Your app screens may look slightly different, but the steps are the same. If you’d rather have an expert handle it, our WiFi installation service at Cam Security Surveillance gets everything set up correctly the first time.
Step 1: Download the App and Create an Account
Open the app store on your phone. Search for your camera brand’s app and install it. Create an account using your email. You’ll need this account to access footage remotely.
Step 2: Power On the Camera
Plug in your camera or insert a charged battery. Wait for the indicator light. Most cameras show a red or amber blinking light when they’re ready to be set up.
Step 3: Add the Camera in the App
Open the app and tap “Add Device” or the “+” icon. The app will ask you to scan a QR code on the camera or enter a device ID manually. Both options are usually printed on the camera’s label or in the box.
Step 4: Connect to Your WiFi Network
The app will ask you to select your WiFi network and enter your password. Make sure you choose the 2.4GHz band if your camera doesn’t support 5GHz. Enter the password carefully. One wrong character here causes most failed setups.
Step 5: Wait for the Camera to Connect
The camera will take 30 to 90 seconds to connect. The indicator light will usually turn solid blue or green when it’s successfully connected. If it keeps blinking or turns red, the connection fails.
Step 6: Name the Camera and Test It
Give the camera a name in the app (Front Door, Backyard, etc.). Then open the live view to confirm it’s working. Check that the image is clear and the connection is stable.
That’s the full process for how to connect a security camera to WiFi. If it fails, the troubleshooting section below covers the most common reasons.
Common Problems When Connecting Security Cameras to WiFi
Wrong WiFi Band
If your camera only supports 2.4GHz and your phone is connected to 5GHz during setup, the camera won’t connect. Temporarily connect your phone to the 2.4GHz band before starting setup.
Incorrect Password
This causes more failed connections than anything else. WiFi passwords are case-sensitive. Double-check every character before submitting.
Camera Too Far from Router
A weak signal during setup causes timeouts. Bring the camera within 10 feet of your router for the initial connection. Move it to its permanent location after setup is complete.
App Permissions Not Granted
If you denied Bluetooth or location permissions when the app asked, the setup process may stall. Go to your phone’s settings, find the app, and grant all requested permissions.
Router Blocking the Camera
Some routers have AP isolation or device blocking enabled. This prevents new devices from joining. Log into your router settings and check for these features if your camera keeps failing to connect.
Firmware Needs Updating
Some cameras ship with older firmware that has connection bugs. Once you get a basic connection, check the app for a firmware update and install it immediately.
How to Improve WiFi Signal for Security Cameras
A dropped or weak signal is the most common complaint after a successful setup. Here’s how to fix it.
Move the router closer to the camera if possible. Even 10 feet makes a difference through walls.
Use a WiFi extender or mesh node. Place it halfway between your router and the camera. This is the simplest fix for cameras in garages, backyards, or far corners of a building.
Switch to a dedicated IoT network. Many modern routers let you create a separate network for smart home devices. This reduces congestion and improves camera stability.
Reduce interference. Microwaves, baby monitors, and neighboring WiFi networks all compete on the 2.4GHz band. If your router supports it, manually set the channel to 1, 6, or 11 to reduce overlap.
Check your upload speed. Security cameras need a consistent upload speed to send footage to the cloud or your phone. At minimum, plan for 1Mbps upload per camera for standard HD streaming.
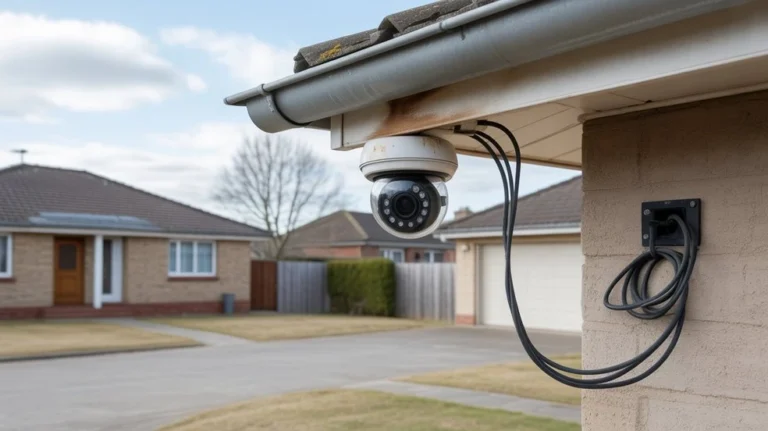
Can Security Cameras Work Without WiFi?
Yes. Not every security camera needs an internet connection. Here are the main options:
Local storage cameras record directly to a microSD card or an NVR/DVR without any internet connection. You review footage by removing the card or connecting directly to the recorder.
4G/LTE cameras use a cellular SIM card instead of WiFi. They’re useful for remote locations like construction sites, farms, or anywhere without a router nearby.
PoE (Power over Ethernet) cameras connect via a network cable to an NVR. They don’t need WiFi at all and are considered the most reliable option for permanent installations.
Analog CCTV cameras use coaxial cable to connect to a DVR. No WiFi, no internet required. These are still widely used in commercial properties.
A CCTV camera internet connection is useful for remote viewing and cloud storage, but it’s not a requirement for every setup. If reliability matters more than convenience, a wired system may serve you better.
Best Security Camera Features to Look For
When shopping for a WiFi camera, these features are worth prioritizing:
Two-way audio lets you speak through the camera via your phone. Useful for doorbell cameras and entry points.
Motion zones let you define exactly which areas trigger an alert. This cuts down on false alarms from trees or passing cars.
Local storage support means the camera can save footage to a microSD card. This keeps your footage accessible even if your internet goes down.
End-to-end encryption protects your video feed from being intercepted. Look for cameras that state this clearly in their specs.
Wide dynamic range (WDR) helps cameras handle scenes with both bright and dark areas, like a doorway with sunlight behind it.
IP65 or IP67 rating means the camera is weather-resistant. Any outdoor camera should have at least an IP65 rating.
WiFi Security Camera Safety Tips
A WiFi camera that isn’t secured properly can be accessed by people outside your home. Here’s how to protect yourself:
Change the default password immediately. Every camera comes with a factory default username and password. These are publicly known. Change them on day one.
Enable two-factor authentication in the app if it’s available. This adds a second layer of protection to your account.
Keep firmware updated. Manufacturers release updates to fix security vulnerabilities. Enable automatic updates or check manually every few months.
Use a strong, unique WiFi password. Avoid simple passwords like “123456” or your address. Use at least 12 characters with a mix of letters, numbers, and symbols.
Disable remote access if you don’t need it. If you never check your cameras from outside your home, turn off remote viewing in the app settings. This reduces your exposure.
WiFi Security Camera vs Wired Security Camera
| Feature | WiFi Camera | Wired Camera |
| Installation | Easy, no cable runs | Requires cable routing |
| Reliability | Depends on signal strength | Very reliable |
| Image quality | Up to 4K on newer models | Up to 4K or higher |
| Power | Battery or plug-in | Wired power only |
| Remote access | Built-in via app | Requires extra setup |
| Cost | Lower upfront | Higher installation cost |
| Best for | Renters, small homes | Permanent commercial installs |
Neither option is always better. WiFi cameras win on flexibility and ease. Wired cameras win on reliability and long-term performance.
Tips for Choosing the Right WiFi Security Camera
Match the camera to the location. Indoor cameras don’t need weatherproofing. Outdoor cameras do. Buy accordingly.
Think about storage costs. Many brands charge a monthly fee for cloud storage. Check the pricing before you buy. Some cameras offer free local storage via microSD.
Check app reviews. The hardware might be great but a poorly designed app ruins the experience. Read recent reviews in the app store before committing.
Consider your internet speed. Running 6 or more cameras on a slow connection causes buffering and missed footage. Check your upload speed first.
Look for ONVIF compatibility if you want to connect to a third-party NVR or recorder. ONVIF is a standard protocol that lets cameras from different brands work together.
Buy from brands with long-term support. A camera that loses app support in two years becomes useless. Stick with established brands that have a track record.
Conclusion
Connecting a WiFi camera doesn’t have to be complicated. The process comes down to three things: the right app, a stable 2.4GHz connection, and a few minutes of setup. Most problems come from weak signals, wrong bands, or typos in the password.
Knowing how to connect a security camera to WiFi the right way means your system works reliably from day one and keeps working. If you ever run into problems or want a professional setup done right, contact us at Cam Security Surveillance and we’ll take care of everything for you.
FAQs
How do I connect to camera WiFi for the first time?
Download the brand’s app, power on the camera, and follow the in-app setup wizard. You’ll scan a QR code or enter a device ID, then enter your WiFi password.
Why won’t my security camera connect to WiFi?
The most common reasons are wrong WiFi band (use 2.4GHz), incorrect password, or the camera being too far from the router during setup.
Can I connect CCTV to WiFi?
Traditional analog CCTV cameras don’t connect to WiFi natively. However, many modern IP cameras marketed as CCTV do support WiFi. Check whether your camera is analog or IP before attempting a wireless setup.
Does a WiFi camera need the internet to record?
No. Cameras with a microSD card slot can record locally without any internet connection. You just can’t view footage remotely without the internet.
How far can a WiFi camera be from the router?
Most cameras work reliably within 30 to 50 feet of the router through walls. Beyond that, a WiFi extender or mesh node is recommended.
What is a CCTV camera internet connection used for?
It’s used for remote viewing, motion alerts sent to your phone, and cloud storage. Without an internet connection, these features are unavailable.
Can I connect a camera to WiFi without the app?
Some cameras support browser-based setup via a direct IP address. But most modern WiFi cameras require the manufacturer’s app for initial setup.