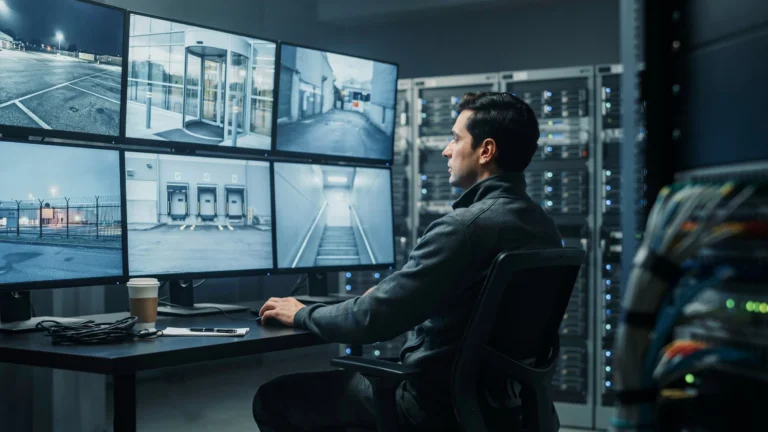
Most people think you need a dedicated recorder to monitor security cameras. You do not. Your PC can do the job just as well, and in many cases even better. A computer gives you a large screen, flexible software, and easy access to recorded footage all in one place.
So if you are wondering how to connect a security camera to a PC, the short answer is: it depends on your camera type. IP cameras connect over a network. Analog cameras need a capture card. Wireless cameras connect via Wi-Fi or software. This guide walks you through every method, step by step.
Can You Connect a Security Camera Directly to a PC?

Yes, you can. But “directly” means different things depending on your camera.
An IP camera connects to your router, and your PC accesses it over the same network. A PoE camera connects through a PoE switch or adapter. An analog CCTV camera needs a USB capture card or DVR to connect to a PC. Wireless cameras connect through their own app or software installed on your PC.
In all cases, your PC becomes the monitor and recorder. No separate NVR or DVR is required, though some setups work better with one. Cam Security Surveillance can help you figure out the right setup for your specific needs.
What You Need Before Connecting a Security Camera to a PC
Before you start, gather the right tools. Missing one item can stall the whole setup.
For IP cameras:
- IP camera with a known IP address
- Router or network switch
- Ethernet cable (Cat5e or Cat6)
- VMS software or browser access
For PoE cameras:
- PoE switch or PoE injector
- Ethernet cable
- PC with a network connection
For wireless cameras:
- Wi-Fi network (2.4GHz or 5GHz)
- Camera’s companion app or ONVIF-compatible software
For analog CCTV cameras:
- USB video capture card
- Coaxial cable
- Compatible recording software
General requirements for all setups:
- PC running Windows 10/11 or macOS
- At least 8GB RAM for multi-camera viewing
- Enough storage for recorded footage (1TB minimum recommended)
- Updated network drivers
Having these ready before you start saves a lot of back-and-forth.
How to Connect an IP Security Camera to a PC
This is the most common method. IP cameras send video over a network, and your PC receives it.
Step 1: Connect the camera to your router using an Ethernet cable.
Step 2: Power on the camera. Most IP cameras use a 12V DC adapter.
Step 3: Find the camera’s IP address. You can use the camera’s included utility software or check your router’s connected devices list.
Step 4: Open a browser on your PC. Type the camera’s IP address into the address bar (example: 192.168.1.64).
Step 5: Log in using the default credentials (usually printed on the camera or in the manual).
Step 6: You should now see a live feed directly in your browser.
For multi-camera viewing or recording, install VMS (Video Management Software) like iSpy, Blue Iris, or Milestone. These tools let you manage multiple cameras from one dashboard on your PC.
This method works well for connecting a security camera computer setup at home or in a small office.
How to Connect a PoE Security Camera to a PC
PoE (Power over Ethernet) cameras get both power and data from a single cable. This makes them clean and reliable.
Step 1: Connect a PoE switch to your PC via Ethernet.
Step 2: Plug your PoE camera into the PoE switch using a Cat6 cable.
Step 3: The switch powers the camera automatically. No separate power adapter needed.
Step 4: Find the camera’s IP address using your router or the camera’s setup tool.
Step 5: Open your VMS software or browser and enter the IP address.
Step 6: Log in and view the live feed.
If you only have one PoE camera and no switch, use a PoE injector. It plugs between your router and camera and delivers power through the cable.
PoE systems are the most reliable option for permanent installations. No Wi-Fi dependency. No power cable clutter.
How to Connect a Wireless Security Camera to a PC
Wireless cameras are the easiest to install. Most connect through an app, but you can also view them on a PC.
Step 1: Download the camera’s companion app on your PC (most brands offer a Windows version).
Step 2: Power on the camera and follow the in-app setup to connect it to your Wi-Fi.
Step 3: Once connected, open the app on your PC and log into your account.
Step 4: Your camera feed should appear in the dashboard.
If your camera supports ONVIF (an open standard for IP cameras), you can also add it to software like Blue Iris or iSpy without using the manufacturer’s app.
Tip: Place your wireless camera within 30 feet of your router for the best signal. Walls and thick materials reduce range significantly.
How to Connect an Analog CCTV Camera to a PC
Analog cameras do not connect directly to a PC through Ethernet. They output a coaxial signal that your PC cannot read on its own. You need a USB capture card.
Step 1: Get a USB video capture card. Look for one that supports your camera’s resolution (typically 960H or 1080p AHD).
Step 2: Connect the coaxial cable from your CCTV camera to the capture card’s BNC input.
Step 3: Plug the USB capture card into your PC.
Step 4: Install the capture card’s driver software.
Step 5: Open a compatible recording app (like iSpy or OBS Studio) and select the capture card as your video source.
Step 6: You should now see your analog camera feed on your PC screen.
This method works for connecting a camera to a computer when you already have an older analog system and do not want to replace all your cameras yet.
How to Connect Security Camera to PC Without Internet
You do not always need the internet to connect CCTV cameras to PCs. A local network works just fine.
Method 1: Direct Ethernet connection Connect the IP camera directly to your PC using an Ethernet cable. Set both the camera and PC to static IP addresses on the same subnet (example: camera = 192.168.0.2, PC = 192.168.0.1). Open a browser and access the camera’s IP directly.
Method 2: Local network switch Connect multiple cameras and your PC to a network switch. No router or internet needed. All devices talk to each other locally.
Method 3: USB capture card (analog cameras) As covered above, this requires no internet at all. The camera feeds directly into your PC through the capture card.
Going offline keeps your footage private and cuts out cloud subscription fees entirely.
How to View Multiple Security Cameras on One PC
Viewing one camera on a PC is simple. Managing six or eight requires the right software.
Most VMS platforms let you add cameras by IP address and view them in a grid layout. Here is how to set it up:
Step 1: Install a VMS app (Blue Iris, iSpy, or Milestone XProtect are popular choices).
Step 2: Open the software and click “Add Camera.”
Step 3: Enter each camera’s IP address, username, and password.
Step 4: Repeat for all cameras. The software will build a multi-camera dashboard.
Step 5: Set recording schedules, motion alerts, and storage paths inside the software.
For smooth multi-camera viewing, your PC should have a dedicated GPU and at least 16GB RAM when running 8 or more feeds simultaneously.
Best Software for Viewing Security Cameras on a PC
Choosing the right software makes a big difference. Here are the top options in 2026.
Blue Iris Best for serious home and small business users. Supports up to 64 cameras. One-time license fee around $70. Highly customizable. Works with almost any IP or ONVIF camera.
iSpy (Agent DVR) Free and open source. Good for beginners. Supports IP cameras, webcams, and capture cards. Cloud features available for a small monthly fee.
Milestone XProtect Professional-grade software used by large businesses. The free version supports up to 8 cameras. Scalable for enterprise use.
Camlytics Clean interface with analytics features like people counting and motion zones. Good for retail or small office use.
Genius Vision Strong ONVIF support. Good free tier. Works well with PoE and IP camera systems.
Pick software that matches your camera count, technical comfort level, and budget.
Common Problems When Connecting a Security Camera to a PC
Even with the right equipment, things sometimes go wrong. Here are the most frequent issues and how to fix them.
Camera not detected on network Check that the camera and PC are on the same subnet. Restart the camera and router. Try using the manufacturer’s IP scanner tool.
No video feed in browser Some cameras require ActiveX plugins or specific browsers. Try Internet Explorer mode in Edge, or use the camera’s dedicated app instead.
Lag or choppy video Lower the stream resolution or frame rate in the camera settings. Check your network for congestion. A wired connection almost always fixes this.
Capture card not recognized Reinstall the driver. Try a different USB port. Make sure the card is compatible with your OS version.
Login credentials not working Factory reset the camera using the physical reset button. Default credentials are usually in the manual or on the camera label.
Motion alerts not triggering Check sensitivity settings in your VMS software. Make sure the motion detection zone is set correctly inside the camera’s web interface.
Security Tips for Connecting Cameras to a Computer
Connecting cameras to a PC opens up some security risks if you are not careful.
Change default passwords immediately. Every camera ships with a default login. Hackers know these. Change them on day one.
Keep firmware updated. Manufacturers release security patches regularly. Check for updates every few months.
Use a VLAN for cameras. Isolate your camera network from your main home or business network. This limits exposure if a camera is compromised.
Disable UPnP on your router. UPnP can automatically open ports for cameras, which creates vulnerabilities.
Use strong passwords for VMS software. Your recording software is as important to secure as the cameras themselves.
Avoid port forwarding if possible. Use a VPN instead for remote access. It is far more secure.
Benefits of Monitoring Security Cameras on a PC
Using a PC as your security hub has real advantages.
Large screen viewing. A 27-inch monitor shows far more detail than a small NVR screen.
Flexible software. PC software offers more features than most DVR/NVR interfaces.
Easy storage management. Add external drives or NAS storage directly to your PC.
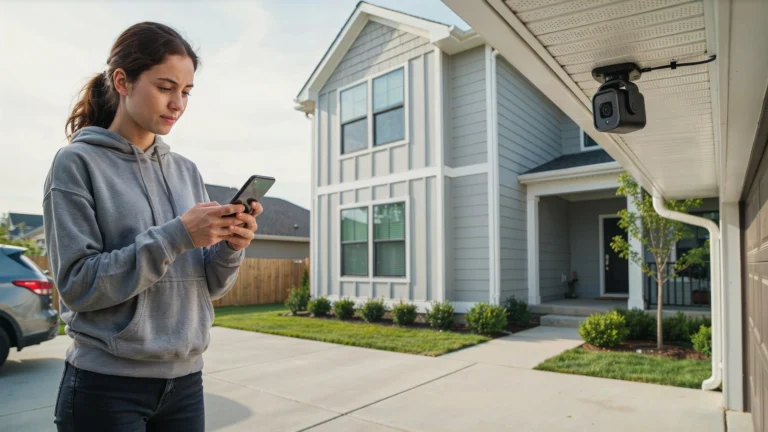
Remote access. Log into your PC remotely using VPN or remote desktop software.
Cost savings. A PC you already own costs nothing extra to repurpose as a security hub.
Notifications and automation. PC software can send email or SMS alerts, trigger alarms, and integrate with smart home platforms.
When to Use a PC Instead of an NVR
A PC makes sense in specific situations. It is not always the best choice.
Use a PC when:
- You already have a capable PC and want to save money on hardware
- You need advanced software features not available on standard NVRs
- You are running a small system with 1 to 8 cameras
- You want to integrate cameras with other software (analytics, smart home, etc.)
Stick with an NVR when:
- You need 24/7 recording without relying on a PC staying powered on
- You are managing 16+ cameras in a commercial setting
- You want a dedicated, always-on system with no performance impact on your main PC
- You prefer a simpler, plug-and-play setup
For most home users, a PC works perfectly well. For business deployments, a dedicated NVR or server is usually the smarter long-term choice.
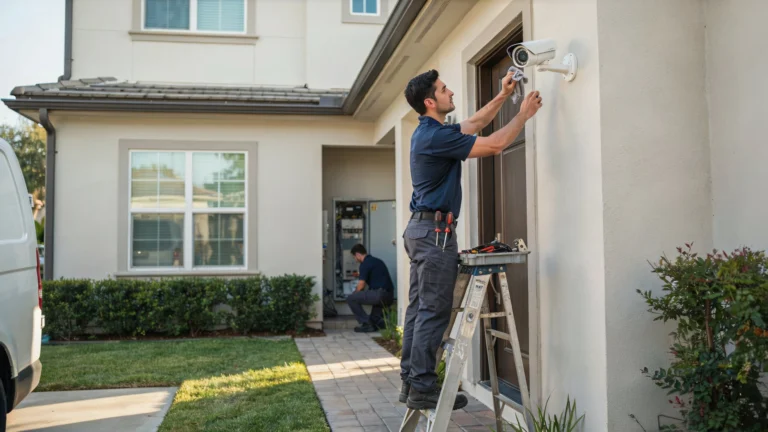
Why Professional Security Camera Setup Matters
Setting up cameras yourself is possible. But getting it right is harder than it looks.
Camera placement matters more than most people realize. A camera pointed at the wrong angle misses the very thing it was meant to catch. Cable runs done poorly fail over time. Software misconfigured from the start creates blind spots in your recording schedule.
That is where professionals make the difference. A certified installer surveys your property, identifies the right camera positions, handles all wiring cleanly, and configures your system correctly the first time.
If you are in Indiana and want a system you can actually trust, Cam Security Surveillance offers expert installation for both homes and businesses. Their team also handles home security systems Indianapolis residents rely on every day, from basic setups to fully integrated commercial builds.
Getting it done right from day one saves you time, money, and frustration down the road.
Conclusion
How to connect security camera to PC is not a single answer. It depends on your camera type. IP cameras connect over a network. PoE cameras need a switch. Wireless cameras use Wi-Fi and software. Analog cameras need a capture card.
Each method works. The key is matching the right approach to your camera and your setup. Use quality software, secure your system properly, and do not skip the basics like changing default passwords.
If you want a setup that works reliably from day one without the trial and error, Cam Security Surveillance is ready to help. Contact Us today and get your cameras connected the right way.
FAQs
Can I connect any security camera to my PC?
Most modern cameras can connect to a PC. IP, PoE, and wireless cameras connect over a network. Analog cameras need a USB capture card.
How do I connect a camera to a PC without a DVR?
Use an IP camera connected via Ethernet or Wi-Fi. Access it through a browser or VMS software. No DVR required.
What software do I need to view security cameras on a PC?
Blue Iris, iSpy, and Milestone XProtect are popular choices. Many cameras also have their own Windows apps.
How many cameras can a PC handle?
It depends on your hardware. A mid-range PC can handle 4 to 8 cameras smoothly. A high-performance PC with a GPU can handle 16 or more.
Is it safe to connect security cameras to a PC?
Yes, if done correctly. Change default passwords, keep firmware updated, use a VPN for remote access, and isolate cameras on their own network.
Can I use my laptop instead of a desktop PC?
Yes. A laptop works the same way. Just make sure it stays plugged in and connected to your network when monitoring.
Why is my security camera not showing on my PC?
Check that both devices are on the same network, the IP address is correct, and the correct software or browser is being used.