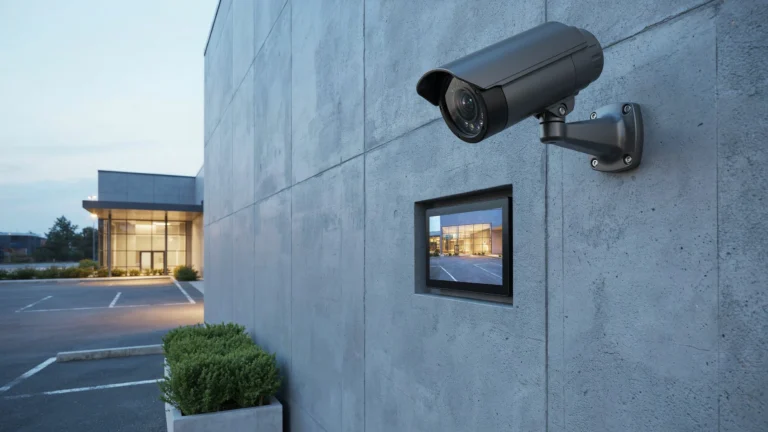

You want to protect your home. But you don’t want holes in your walls. Good news: you can mount a fully working outdoor security camera without touching a drill. Most modern cameras are designed for renters, apartment dwellers, and anyone who wants a clean setup fast.
So, how do you install an outdoor security camera without drilling? You use strong adhesive mounts, magnetic bases, gutter clips, solar panel stands, or window mounts. Each method works well in the right spot. This guide walks you through all of them.
What Is a No-Drill Security Camera Installation?

A no-drill security camera installation means mounting your camera outdoors without using screws, anchors, or wall penetrations. Instead, you rely on alternative mounting systems that grip surfaces using adhesive, magnets, clips, or weight.
This approach has grown popular for a few reasons:
- Renters cannot drill into walls without landlord permission
- Homeowners want to avoid patching holes when repositioning cameras
- Some wall surfaces, like stucco or brick, are harder to drill into without special tools
No-drill doesn’t mean low quality. Many wireless outdoor security camera mounting systems are rated for heavy rain, wind, and extreme temperatures. They hold just as firm as drilled mounts when installed correctly.
Benefits of Installing an Outdoor Security Camera Without Drilling
Here’s why more people are going the no-drill route:
No damage to your property. Adhesive mounts and gutter clips leave no marks. This is critical if you’re renting or living in a condo with strict rules.
Faster setup. You can have a camera running in under 15 minutes. No searching for studs, no measuring twice, no patching later.
Easy repositioning. If your camera angle needs adjusting, you remove it and remount. No leftover holes, no mess.
Works on almost any surface. Vinyl siding, brick, glass, metal gutters, wood fences. There’s a no-drill solution for each one.
Great for temporary setups. Moving soon? Setting up cameras for a short rental period? No-drill mounts make removal clean and simple.
Best Outdoor Security Cameras for No-Drill Installation
Not every camera works well without drilling. You want cameras that are lightweight, battery-powered or solar-powered, and come with flexible mounting accessories.
Here are the types worth considering:
Battery-powered cameras are the top choice for no-drill setups. No wiring needed. Brands like Arlo, Ring, and Eufy make popular models with dedicated magnetic or adhesive mount kits.
Solar-powered cameras pair perfectly with ground stands or fence mounts. They charge themselves and never need a power cable run to your wall.
Wire-free cameras with magnetic bases are the easiest to move. The base sticks or clips to a surface, and the camera snaps on magnetically.
Smaller, compact cameras are better for adhesive mounts. Heavy cameras put more stress on the adhesive, which can fail over time, especially in heat.
When shopping, look for cameras that come with no-drill mounting hardware in the box. Many brands now include adhesive plates, magnetic mounts, or gutter clip adapters as standard accessories.
Methods to Install an Outdoor Security Camera Without Drilling
This is the core of what you need to know. There are five reliable methods for no drill security camera installation, and each fits a different situation.
1. Adhesive Mounts
Heavy-duty outdoor adhesive strips and adhesive plates are the most common solution. Brands like 3M make outdoor-rated adhesives that hold up to 10 lbs in temperatures ranging from freezing to 100°F.
Best for: Smooth surfaces like vinyl siding, painted wood, metal doors, and PVC fascia boards.
How it works: Clean the surface with rubbing alcohol. Let it dry. Press the adhesive mount firmly for 30 to 60 seconds. Wait 24 to 48 hours before loading the mount with a camera. That waiting period is critical. Rushing it causes premature failure.
Watch out for: Rough, porous, or painted brick. Adhesive doesn’t bond well to these. Also avoid surfaces that get very hot in direct sun, as heat weakens adhesive over time.
2. Magnetic Mounts
Many cameras come with a magnetic base. The magnet attaches to a metal plate, which you secure to a surface using adhesive or a clip rather than screws.
Best for: Lightweight cameras that need frequent repositioning.
How it works: Stick or clip the metal plate to your chosen surface. The magnetic camera head snaps to it in seconds and can be angled easily.
Watch out for: Magnetic mounts are not for heavy cameras. The magnetic grip is strong, but vibration or wind can shift the camera angle over time. Check alignment weekly.
3. Gutter and Eave Clips
Gutter clips are one of the smartest outdoor security camera mounting options for homes with standard gutters. They slide over the top lip of your gutter with no adhesive or screws needed.
Best for: Corner coverage, driveway views, and entry point monitoring.
How it works: Slide the clip over the gutter edge. Tighten the set screw by hand. Mount the camera to the clip arm. Done.
Watch out for: Not all clips fit all gutter sizes. Measure your gutter width before buying. Also clean your gutters regularly because debris buildup can loosen the clip over time.
4. Freestanding Solar Stake Mounts and Tripod Stands
If you need a camera in your yard, garden, or near a driveway entrance, a freestanding mount is your answer. Solar stake mounts push into the ground. Tripod stands sit on any flat surface.
Best for: Yard coverage, driveway entrances, garden corners, and temporary event monitoring.
How it works: Push the stake into soft ground or set the tripod on a hard surface. Adjust the angle. The camera runs off a solar panel on the stake itself or off battery.
Watch out for: Wind is the enemy of freestanding mounts. In high-wind areas, weight the base with sandbags or position the stand near a fence for shelter.
5. Window Mounts and Suction Cup Mounts
For cameras that monitor outdoor areas through a window, suction cup mounts offer a firm hold on glass.
Best for: Monitoring driveways, front yards, and parking areas from inside the window. Great for apartments.
How it works: Clean the glass with glass cleaner. Press the suction cup mount against the glass and lock the lever. The camera faces outward through the window.
Watch out for: Window mounts only work with cameras that can film through glass without IR reflection at night. Many IR cameras reflect off glass in night vision mode. Look for cameras with a “no glow” or external LED mode.
Need professional security camera installation in Indianapolis? Cam Security Surveillance offers expert security camera installation Indianapolis services for both residential and commercial properties. From no-drill setups to full wired systems, we handle it all.
Step-by-Step Guide to Installing an Outdoor Security Camera Without Drilling
Here’s a clean walkthrough using the adhesive mount method, which works for most homeowners.
What you need:
- Outdoor-rated security camera
- Heavy-duty outdoor adhesive mount (3M or brand-supplied)
- Rubbing alcohol and a clean cloth
- A level app on your phone
- Zip ties (optional, for cable management)
Step 1: Choose your camera location. Think about what you need to cover. Front door, driveway, backyard gate? The ideal height is 8 to 10 feet. High enough to avoid tampering. Low enough for clear facial detail.
Step 2: Check for power and Wi-Fi. Battery cameras skip this step. For any camera that needs power, make sure you have an outdoor outlet nearby or a way to route a cable without drilling.
Step 3: Clean the mounting surface. Wipe the surface with rubbing alcohol. This removes dirt, oil, and old paint flakes that would prevent the adhesive from bonding. Let it dry completely, at least 5 minutes.
Step 4: Apply the adhesive mount. Peel the backing from the adhesive. Press the mount firmly onto the surface. Hold steady pressure for 60 seconds. Do not rush.
Step 5: Wait. This is the step most people skip. Let the adhesive cure for 24 to 48 hours before mounting the camera. Adhesive bonds reach full strength during this period.
Step 6: Mount the camera. Snap or thread the camera onto the mount. Use your phone’s level app to check the angle. Adjust until the frame shows exactly what you want.
Step 7: Connect and configure. Pair the camera with your app. Set motion zones to reduce false alerts. Test the night vision by walking through the camera’s field of view after dark.
Step 8: Manage the cable (if applicable). Use adhesive cable clips to route the power cable along the wall edge. Zip ties work well for bundling cables near gutters or overhangs.
Common Mistakes to Avoid
Even simple installs go wrong. Here’s what to watch for:
Skipping the surface prep. Dusty or oily surfaces kill adhesive bonds. Always clean first.
Mounting in direct sun on a dark surface. Dark surfaces absorb heat. Adhesive softens at high temperatures. Choose a shaded mounting spot when possible.
Overloading an adhesive mount. Check the weight rating on the adhesive and the camera. A 1.5 lb camera on a mount rated for 1 lb will fail, likely on the hottest day of the year.
Ignoring Wi-Fi signal strength. Check your Wi-Fi signal at the mounting spot before committing. A weak signal causes buffering and missed recordings.
Wrong camera height. Too high and you lose facial detail. Too low and the camera is easy to grab or block. Eight to ten feet is the sweet spot for most outdoor cameras.
Not waterproofing cable entry points. If you’re routing a power cable through a small gap, seal around it with outdoor silicone caulk. Water intrusion is a real risk.
How to Keep a No-Drill Camera Secure Outdoors
A camera that falls or gets stolen defeats the purpose. Here’s how to protect your install:
Use security screws on the camera housing. Even without drilling the wall, many cameras have an optional security screw on the mount head. Use it.
Add a cable lock. Some cameras have a security slot. A steel cable lock threading through the slot and around a fixture like a gutter bracket adds a physical deterrent.
Check the mount monthly. Outdoor elements work on adhesive over time. Give the mount a gentle push and pull test every few weeks to catch weakening before the camera falls.
Use tamper alerts. Most smart cameras send a notification if the camera is moved or covered. Enable this in your app settings.
Position cameras visibly. A visible camera deters theft. Don’t hide it so well that a thief doesn’t even know it’s there.
Are No-Drill Security Camera Mounts Reliable?
Yes, with the right mount and the right surface.
Adhesive mounts have improved dramatically in recent years. Outdoor-rated adhesive from reputable brands holds up to heavy rain, wind, and temperature swings when applied correctly. The key variables are surface quality, camera weight, and sun exposure.
Gutter clips are arguably the most reliable no-drill option. They don’t rely on chemistry or magnetism. They’re mechanical, and when sized correctly, they grip firmly.
The weakest link in most no-drill setups is skipped prep steps and wrong surface matching. Follow the manufacturer’s surface compatibility guide. Don’t use indoor adhesive outdoors. Don’t mount a heavy camera on a lightweight clip.
Compared to drilled mounts, no-drill options require slightly more maintenance, mainly periodic checks. But for most home use cases, they perform reliably for years.
When to Consider Professional Security Camera Installation
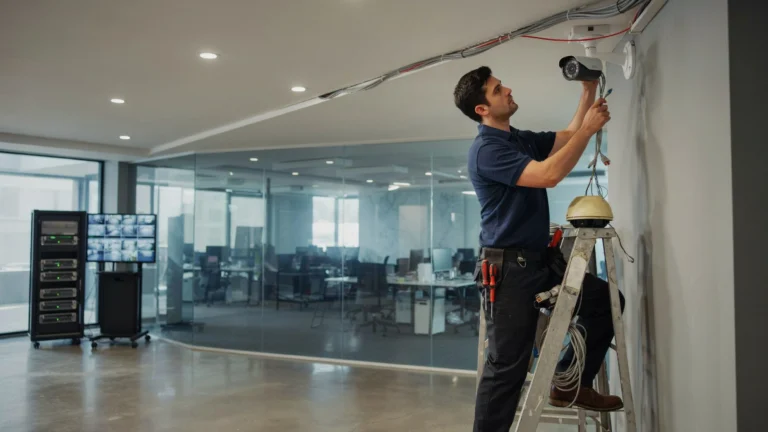
No-drill installs are great for basic setups. But there are situations where calling a professional makes more sense.
You need wired cameras. If you want PoE (Power over Ethernet) cameras for 24/7 recording without battery changes, professional installation is the better path. Routing cables properly requires drilling in most cases.
You have a large property. Multiple cameras across a big property need careful planning for coverage overlap, Wi-Fi range, and cable routing. A professional assessment saves time and money.
You need NVR or DVR systems. Network video recorders and digital video recorders require proper wiring to each camera. This isn’t a DIY-friendly job for most homeowners.
You want cameras on difficult surfaces. Stucco, concrete, and brick can crack if drilled incorrectly. A professional has the right tools and knows how to anchor properly on these surfaces.
You want it done right the first time. There’s no shame in calling a pro. A well-installed system protects your home far better than a poorly placed one.
Conclusion
Installing an outdoor security camera without drilling is completely practical. Adhesive mounts, gutter clips, magnetic bases, solar stakes, and window mounts each offer a clean, damage-free solution depending on your surface and camera type.
The most important steps are choosing the right method for your surface, doing proper prep work, and giving adhesive time to cure. Skip those and even the best mount will fail.
Whether you’re a renter protecting your first apartment or a homeowner who doesn’t want wall damage, how do you install an outdoor security camera without drilling has a clear answer: pick the right mount, prep your surface well, and let the adhesive set. It’s that simple.
For complex setups or professional-grade systems, reach out to Cam Security Surveillance. Our team helps homeowners and businesses in Indianapolis and nearby areas achieve reliable camera coverage with expert installation and support. Contact us today to discuss your security needs and find the right solution for your property.
FAQs
Can outdoor security cameras be mounted without drilling?
Yes. Adhesive mounts, gutter clips, magnetic bases, and freestanding stands all support outdoor cameras without wall penetration.
What is the best adhesive for mounting an outdoor security camera?
3M outdoor mounting tape or heavy-duty VHB (Very High Bond) tape rated for exterior use works best. Always check the weight rating that matches your camera.
How long does outdoor adhesive last on exterior walls?
High-quality outdoor adhesive lasts 2 to 5 years under normal conditions. Check the mount every month and replace if you notice weakening.
Do wireless outdoor security cameras need Wi-Fi?
Most do. They connect to your home network to send footage to an app or cloud storage. Some cameras can store footage locally on a microSD card even without Wi-Fi.
Will a no-drill camera mount hold in heavy rain and wind?
Yes, if rated for outdoor use and installed on a clean, compatible surface. Gutter clips are the most weather-resistant no-drill option.
Can I install an outdoor security camera without an electrician?
Battery and solar-powered cameras need no wiring at all. You can set them up entirely on your own without any electrical work.
How do I install a security camera on vinyl siding without drilling?
Use vinyl siding hooks or heavy-duty outdoor adhesive mounts designed for vinyl surfaces. Siding hooks slide under the bottom edge of the siding panel and grip without any adhesive or screws.
Is no-drill security camera installation good for renters?
Absolutely. It’s one of the best reasons to go no-drill. Adhesive mounts and gutter clips leave no damage and come off cleanly when you move out.