
You need cameras, a recorder, cables, power supply, and a stable internet connection to set up CCTV at home or work. The camera type and storage size matter just as much as the mounting spot you pick. Skip one piece and the whole system can fail.
What is needed to install a CCTV system comes down to five basics: cameras, a recorder, cables, power, and planning. Cam Security Surveillance breaks down each part so you can choose the right setup and get it right the first time.
What Equipment Is Needed to Install CCTV?
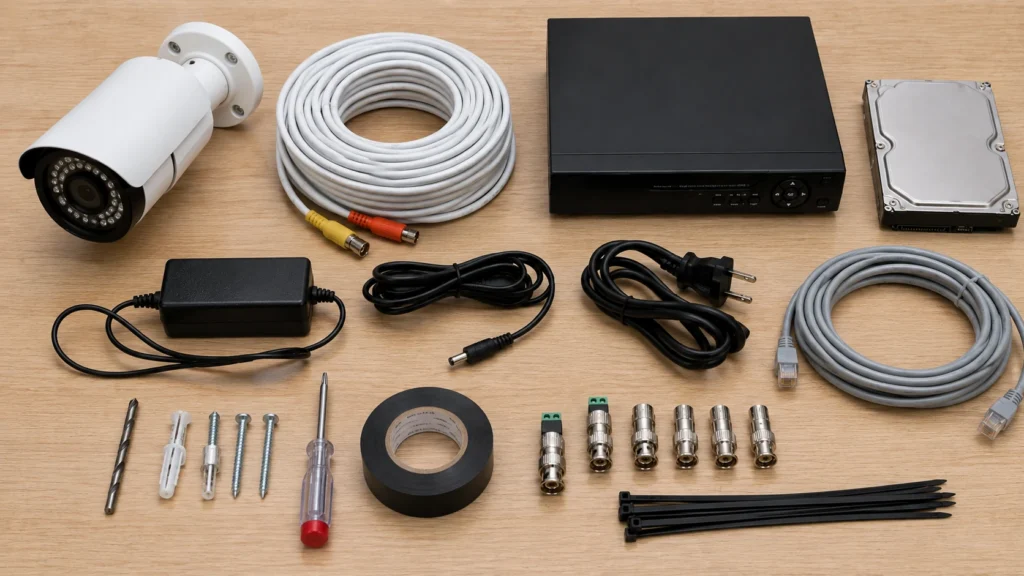
Before you touch a drill, gather the right gear. A basic setup for the installation of CCTV systems includes cameras, a recording device, cables, a power source, and a monitor or app to view footage. You also need mounting brackets, screws, and a drill.
Most homeowners buy a kit that bundles cameras and a recorder together. This saves money and cuts down on compatibility issues. If you want more control, buy each piece on its own. Either way, check that every part works with the others before you start.
CCTV Camera Types to Choose From
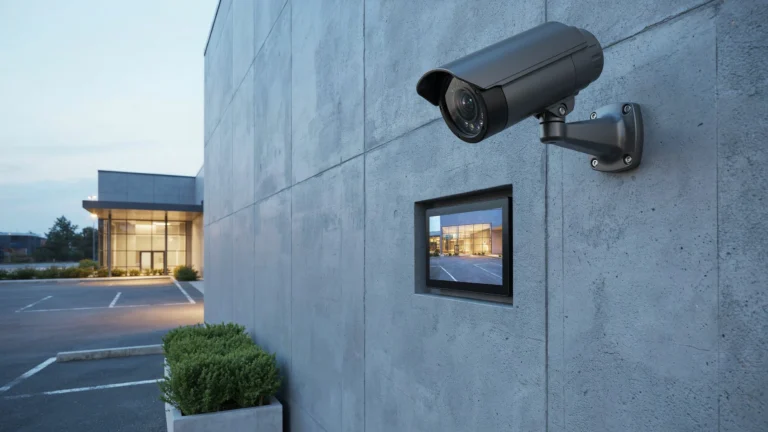
Not every camera fits every space. Dome cameras work well indoors because they blend into ceilings and resist tampering. Bullet cameras suit outdoor spots since they have a long, narrow shape built for distance viewing.
PTZ cameras (pan-tilt-zoom) let you move the lens remotely, which helps cover large yards or parking lots. Wireless cameras skip the wiring hassle but rely on strong Wi-Fi. Wired cameras give a steadier signal and work better for full-time recording.
Pick based on your space, budget, and how much control you want over the picture.
Do You Need a DVR or NVR for CCTV?
A DVR (Digital Video Recorder) works with analog cameras and converts the signal into digital footage. An NVR (Network Video Recorder) works with IP cameras and processes video that’s already digital.
If your cameras connect over Wi-Fi or Ethernet, go with an NVR. If you’re using older analog cameras, a DVR is the right match. Mixing the wrong recorder with the wrong camera type is one of the most common mistakes in any cctv security recording system installation.
How Much Storage Do You Need for CCTV?
Storage depends on camera count, resolution, and how many days you want to keep footage. A single 1080p camera recording nonstop can use close to 60GB per day. Multiply that by every camera in your system.
Most homes do fine with a 1TB to 2TB hard drive, which holds one to two weeks of footage from a few cameras. Businesses with more cameras or higher resolution often need 4TB or more. Motion-only recording stretches your storage further than continuous recording.
What Cables Are Needed for CCTV Installation?
Wired systems need a few cable types. Coaxial cables carry video for analog systems. Ethernet cables (Cat5e or Cat6) carry both video and data for IP cameras. Power cables run from each camera back to a power source or the recorder itself.
Many installers use PoE (Power over Ethernet) cables, which send power and video through a single line. This cuts down on clutter and makes requirements for cctv camera installation easier to manage, especially in tight spaces.
What Power Supply Does CCTV Need?
Cameras usually run on 12V DC power, though some PoE models draw power straight from the network cable. Each camera needs its own power connection unless you’re using a PoE switch that handles multiple cameras at once.
Check the wattage on your recorder and camera lineup before buying a power supply. An underpowered system causes flickering footage or random camera shutdowns, which defeats the purpose of having security in the first place.
Tools Needed to Install CCTV
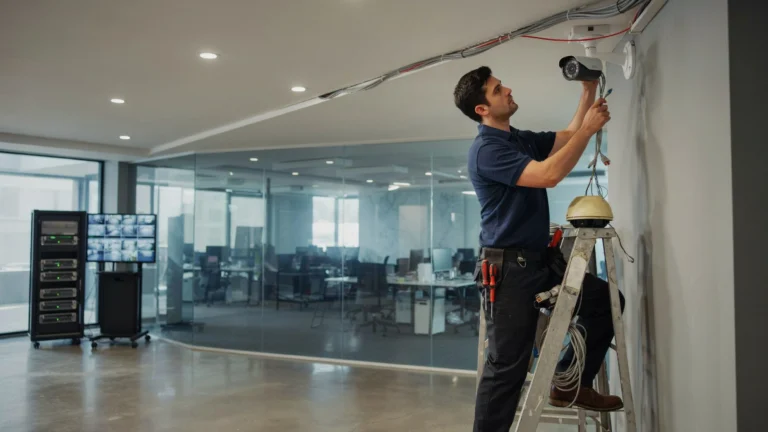
You don’t need a full toolbox, but a few items make the job much easier. Grab a power drill, screwdriver set, cable stripper, ladder, stud finder, and a cable tester. A fish tape helps pull wires through walls and ceilings.
Label makers save time later when you’re troubleshooting which cable runs where. Having the right tools on hand from the start speeds up the entire installation of cctv system process and reduces mistakes.
Where Should CCTV Cameras Be Installed?
Cover every entry point first: front and back doors, garage entrances, and ground-floor windows. Driveways and side gates are common blind spots that burglars target. Indoors, hallways and staircases give you a clear view of movement through the house.
Avoid pointing cameras directly at bright light sources, since this washes out the image at night. Also avoid areas that violate privacy laws, like neighbors’ windows or shared bathrooms.
How High Should CCTV Cameras Be Mounted?
Most experts recommend mounting cameras between 8 and 10 feet off the ground. This height keeps the camera out of reach for tampering while still capturing clear facial details.
Going too high, past 12 feet, makes faces harder to identify since the angle becomes too steep. Angle the camera slightly downward, around 15 to 30 degrees, to balance coverage area with image clarity.
What Internet Connection Is Needed for CCTV?
If you want remote viewing on your phone, you need a stable internet connection with decent upload speed. Upload speed matters more than download speed here, since the camera sends footage out to the cloud or your app.
A minimum of 2 to 4 Mbps upload speed per camera is a safe baseline for smooth remote access. Slower connections still work for local recording, but live streaming and instant alerts may lag.
Step-by-Step CCTV Installation Process
Once you understand what is needed to install a CCTV system, the actual setup follows a clear order. Start by planning camera positions based on your coverage goals. Run cables from each spot back to the recorder location.
Mount the cameras at the correct height and angle, then connect them to the power source and recorder. Set up the NVR or DVR, configure your storage settings, and connect the system to your Wi-Fi or router. Test every camera angle before you seal up any wiring behind walls.
CCTV Installation Mistakes to Avoid
A few slip-ups show up again and again. Pointing cameras at glass doors or windows causes glare that ruins night footage. Skimping on cable quality leads to signal loss over long distances.
Another common issue is picking storage that’s too small, which forces the system to overwrite footage sooner than expected. Placing cameras too high also weakens facial detail, making footage less useful for identification. Take your time during the installation of cctv systems instead of rushing through it.
DIY vs. Professional CCTV Installation
DIY installation saves money and works fine for small setups with one or two cameras. You control the timeline and skip labor costs. But running cables through walls, setting up remote access, and troubleshooting signal issues can eat up a full weekend or more.
Professional installers bring experience, proper tools, and warranty-backed work. They also know local codes and can spot blind spots you might miss. If you’re in Indiana and want it done right the first time, home security system installation Indianapolis services from Cam Security Surveillance handle everything from camera placement to network setup, so you’re not left guessing.
Choose DIY if you’re comfortable with basic wiring and want to save on labor. Choose a professional if you want a faster setup with fewer risks.
How Much Does CCTV Installation Cost?
Costs vary based on camera count, quality, and whether you hire a professional. A basic DIY kit with four cameras can run between $150 and $400. Professional installation for a similar setup often costs $600 to $1,500, including labor and cabling.
Higher-end systems with more cameras, cloud storage, or advanced features like facial recognition can push costs past $2,000. Get a few quotes before committing, and factor in ongoing costs like cloud storage subscriptions.
CCTV Installation Checklist
Before you start, run through this list to make sure you’re not missing anything needed to install a CCTV system:
- Cameras that match your indoor or outdoor needs
- DVR or NVR that matches your camera type
- Enough storage for your recording habits
- Cables rated for the distance you’re running
- A reliable power source for every camera
- Basic tools: drill, ladder, cable stripper, tester
- A stable internet connection for remote access
- A clear plan for camera placement and height
Checking off each item before installation day saves time and prevents last-minute store runs.
Legal Requirements for CCTV Installation
Before mounting any camera, check your local and state laws. Some areas require signage that notifies visitors they’re being recorded. Audio recording often has stricter rules than video, so check whether your state requires consent from both parties.
Avoid aiming cameras at neighboring properties or shared spaces without permission. Staying within legal limits protects you from disputes and keeps your footage usable if you ever need it for a police report or insurance claim.
Conclusion
Now you know exactly what is needed to install a CCTV system: the right cameras, a matching recorder, enough storage, proper cabling, reliable power, and a stable connection. Add in careful planning for camera placement and height, and you’ll end up with a system that actually protects your property instead of just looking like it does.
Whether you handle it yourself or bring in a professional, following these requirements for CCTV camera installation gives you footage you can trust when it matters most. Contact us today for expert CCTV installation and reliable security solutions for your home or business.
FAQs
What is needed to install a CCTV camera at home?
You need a camera, recorder (DVR or NVR), cables, a power supply, mounting tools, and a stable internet connection for remote viewing.
Can I install CCTV myself without an electrician?
Yes, most CCTV kits are designed for DIY installation. You’ll need basic tools and some comfort running cables through walls or ceilings.
How many cameras do I need for a small house?
Four to six cameras usually cover the main entry points, driveway, and backyard of a typical home.
Does CCTV need Wi-Fi to work? No, wired systems can record locally without the internet. Wi-Fi is only required for remote viewing on your phone or app.
How long does CCTV footage stay stored?
This depends on storage size and recording settings, but most home systems hold one to two weeks of footage before older clips get overwritten.