Setting up a security camera system is one of the smartest investments you can make for your home or business. Crime does not wait for you to be ready. A properly installed system deters threats, captures evidence, and gives you eyes on your property 24/7.
If you are new to this, understanding the basics of installing a security camera system can save you from costly mistakes. This guide covers everything from planning and camera selection to setup and long-term performance in plain, simple language.
Why Install a Security Camera System?

The answer is simple. Security cameras protect what matters most to you.
Visible cameras reduce crime before it happens. Studies consistently show that properties with cameras are far less likely to be targeted. When something does go wrong, footage helps police identify suspects and supports insurance claims.
Beyond crime prevention, cameras help you monitor employees, deliveries, and activity around your property in real time. Business owners use them to reduce liability. Parents use them to keep an eye on kids. Homeowners use them to check in while traveling.
If you are based in Indianapolis and want a system installed correctly from day one, Cam Security Surveillance offers trusted CCTV installation services in Indianapolis for homes and businesses of all sizes. Getting it right from the start matters more than most people realize.
Understanding Security Camera Systems
Before you buy anything, it helps to understand what a complete system looks like.
A basic surveillance camera system installation includes:
- Cameras — the devices that capture video
- A recorder — DVR (for analog cameras) or NVR (for IP cameras)
- Storage — hard drives, SD cards, or cloud
- Cables or Wi-Fi — to transmit video signals
- A monitor or app — to view footage live or on playback
The cameras do not work on their own. Every piece needs to work together. A mismatch in equipment like pairing the wrong camera type with the wrong recorder leads to poor performance or a system that simply does not work.
Analog vs. IP Systems
Analog cameras connect via coaxial cables to a DVR. They are affordable and reliable but limited in resolution. IP cameras connect via ethernet cables or Wi-Fi to an NVR. They offer higher resolution, smarter features, and remote access. Most new installations today use IP-based systems.
Planning Before Installation

This is the step most people skip, but it is the most important when planning reliable home security systems Indianapolis homeowners can trust.
Map your property first. Walk around and identify every entry point, doors, windows, driveways, gates, and any blind spots. Write them down or sketch a rough layout.
Ask yourself these questions:
- How many cameras do I need?
- Which areas need 24/7 coverage?
- Will cameras be indoor, outdoor, or both?
- Do I need night vision?
- Where will the recorder be placed?
- How will cables be routed (if wired)?
Lighting conditions matter. A camera facing a bright window during the day will produce a washed-out image. A dark parking lot at night needs IR night vision or supplemental lighting to capture usable footage.
Check local regulations. Some areas have rules about where cameras can point, especially toward public spaces or neighboring properties. It is worth checking before you mount anything.
Good planning upfront means fewer adjustments later and better coverage overall.
Choosing the Right Security Cameras
Not every camera fits every situation. Here is a quick breakdown.
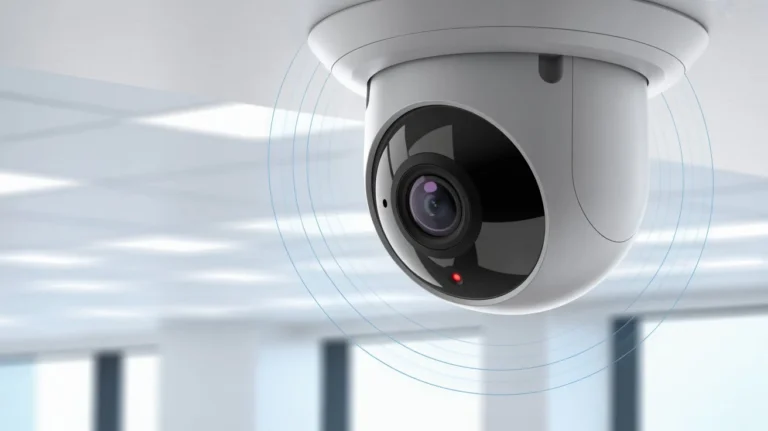
Dome Cameras Ceiling-mounted, rounded shape. Hard to tell which direction they face. Great for indoor spaces like lobbies, offices, and hallways.
Bullet Cameras Long, cylindrical design. Visible and weather-resistant. Ideal for outdoor use driveways, parking lots, and building perimeters. They are also a popular choice for apartment building security cameras where covering entry points and shared areas is a priority.
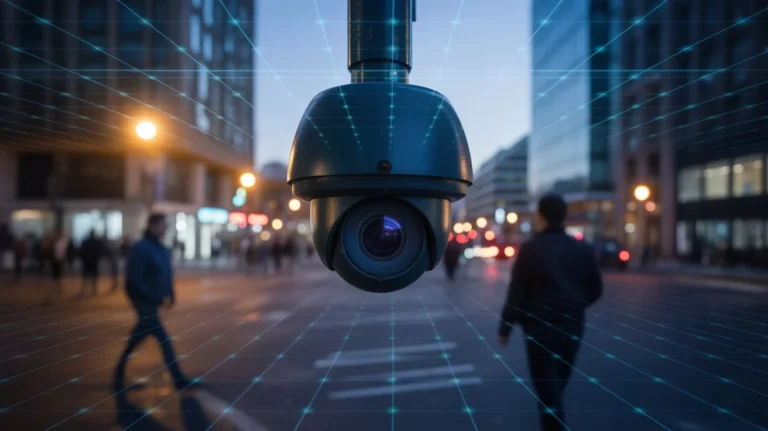
PTZ Cameras Pan, tilt, and zoom capability. Covers large open areas and can be controlled remotely. Common in warehouses, parking structures, and stadiums.
Turret Cameras Ball-and-socket mount. Easy to adjust without full reinstallation. A solid all-around option for both indoor and outdoor use.
IP Cameras Connect over ethernet or Wi-Fi. Support higher resolutions (1080p to 4K). Best choice for modern CCTV system installation setups.
What resolution do you need? 1080p is the minimum standard today. If you need to read license plates or identify faces at a distance, go with 4K. Higher resolution also means more storage, so plan accordingly.
Step-by-Step Security Camera Installation Process
Here is how a proper camera system installation works from start to finish.
Step 1: Gather Your Equipment
Make sure you have cameras, a recorder, cables (if wired), a power source, mounting hardware, and a drill.
Step 2: Position the Recorder
Place your DVR or NVR in a secure, ventilated location. A locked cabinet is ideal. Keep it away from high-traffic areas where it could be tampered with.
Step 3: Mount the Cameras
Use a pencil to mark mounting holes at each camera position. Drill pilot holes and secure the mounting bracket. Make sure outdoor cameras are mounted under an overhang when possible to protect from direct rain.
Step 4: Run the Cables
For wired systems, run cables through walls, ceilings, or along baseboards from each camera to the recorder. Use cable clips or conduit to keep runs clean and protected. Label each cable at both ends.
Step 5: Connect Cameras to the Recorder
Plug camera cables into the corresponding ports on your DVR or NVR. For wireless systems, connect cameras to your Wi-Fi network through the manufacturer’s app.
Step 6: Power the Cameras
Most IP cameras use PoE (Power over Ethernet), meaning the same cable that carries data also delivers power. Analog cameras need a separate power supply or power adapter.
Step 7: Configure the Recorder
Set up the date, time, recording schedule, and motion detection zones. Configure storage settings and decide how long footage should be retained before it overwrites.
Step 8: Test Every Camera
View each camera on the monitor before finishing. Check the angle, focus, image quality, and night vision. Adjust as needed.
Step 9: Set Up Remote Access
Install the manufacturer’s app on your smartphone. Connect the recorder to your router and configure remote viewing. Test it from outside your home network.
Wired vs. Wireless Camera Installation
This is one of the most common decisions people face when they set up a security camera system.
Wired Systems
Cables connect cameras directly to the recorder. The signal is stable and consistent. No interference from other devices. Harder to install requires drilling and routing cables. Best for permanent setups in homes and businesses.
Wireless Systems
Cameras connect via Wi-Fi. Easier to install and reposition. No cable routing required. Signal quality depends on your router’s strength and placement. Can experience interference in areas with many connected devices.
The honest answer: Wired systems are more reliable long-term. Wireless systems are more convenient to install. If you own the property and plan to stay, wired is worth the effort. If you rent or need a temporary setup, wireless is a practical choice.
Common Security Camera Installation Mistakes
Even experienced DIYers make these errors. Avoid them from the start.
Mounting cameras too high. A camera at 10 feet captures sky and the tops of heads not faces. Mount at 7 to 9 feet for the best facial recognition angle.
Not testing before finishing walls. Always test the full system before sealing cable runs or painting over mounts.
Forgetting the recorder location. The recorder needs to be somewhere secure, ventilated, and out of plain sight. Many people set it up in an obvious location that is easy to access and steal.
Using the wrong cable type. Long cable runs with the wrong gauge or category cable result in signal loss and blurry footage. Check the manufacturer’s specifications before purchasing cable.
No backup power. Power outages leave your property unprotected. A UPS (uninterruptible power supply) keeps your system running during brief outages.
Ignoring firmware updates. Outdated firmware creates security gaps in IP-based systems. Keep your cameras and recorder updated.
Tips for Better Security Camera Performance
Getting more from your system comes down to small details.
- Clean camera lenses every few months. Dust and spider webs reduce image clarity.
- Set motion detection sensitivity carefully. Too high triggers constant alerts. Too low misses real events.
- Use overlapping camera fields of view. This eliminates blind spots and ensures full coverage.
- Add lighting near cameras. Even basic motion-activated lights improve night footage significantly.
- Label all cameras in your recorder software. “Front Door” is more useful than “Camera 4” when reviewing an incident.
- Back up critical footage. If something important happens, save that footage manually before it overwrites.
DIY vs. Professional Security Camera Installation
Both options have real merit. The right choice depends on your situation.
DIY Installation Lower upfront cost. Works well for simple setups with two to four cameras. Requires comfort with drilling, cable routing, and basic network configuration. Risk of coverage gaps and setup errors if done without proper planning.
Professional Installation Higher upfront cost but better long-term results. A professional handles everything: site survey, camera placement, cable routing, recorder setup, and remote access configuration. They spot coverage problems you might miss. They also ensure the system meets building codes and local regulations. If you are ready to move forward, searching for a professional security camera installation near me is the fastest way to find a certified local team.
For businesses, multi-floor buildings, or any property with complex layouts, professional installation is worth every dollar.
How Much Does Security Camera Installation Cost?
Costs vary based on the number of cameras, system type, and whether you hire a professional.
| Setup Type | Estimated Cost |
| Basic DIY Home (2-4 cameras) | $150 – $400 |
| Mid-range Home System (4-8 cameras) | $400 – $1,000 |
| Professional Home Installation | $800 – $2,500 |
| Small Business System | $1,500 – $5,000+ |
| Commercial / Multi-Camera | $5,000 – $20,000+ |
These are general estimates. Actual costs depend on your location, camera quality, cable runs, and labor rates. Always get multiple quotes and ask what is included.
Future Trends in Security Camera Systems
The industry is changing fast. Here is what is coming.
AI-Powered Detection Cameras are getting smarter. AI can now detect specific behaviors — like a person loitering near a vehicle or a crowd forming suddenly — and trigger instant alerts.
4K and Beyond Ultra-high-resolution cameras are becoming the new standard, even for residential use. More detail means better evidence and more flexible digital zoom in post.
Edge Processing Cameras with onboard processors analyze video locally, reducing the load on central servers and speeding up alert times.
Cloud-Integrated Systems Hybrid systems that store footage both locally and in the cloud are growing. They offer redundancy if someone destroys the recorder, cloud backup preserves the footage.
License Plate Recognition (LPR) Once a tool for law enforcement, LPR is now accessible for private businesses and even some residential properties.
Why Professional Installation Matters
Knowing the basics of installing a security camera system is valuable. But knowing where it gets complicated is just as important.
A professional does more than hang cameras. They plan coverage to eliminate blind spots. They route cables cleanly and securely. They configure recording schedules, motion zones, and access controls correctly. They test the entire system before leaving.
At Cam Security Surveillance our certified technicians bring hands-on experience to every installation. We have worked with homes, retail stores, warehouses, and offices across Indianapolis. We do not just install, we make sure your system actually protects you.
Whether you need a two-camera home setup or a full commercial CCTV system installation, we build it right the first time.
Conclusion
Understanding the basics of installing a security camera system gives you the foundation to make smart decisions. From planning and camera selection to cabling and configuration, every step matters. A system that is poorly planned or incorrectly installed is worse than no system at all. It gives you false confidence while leaving real gaps in your security.
Take the time to plan correctly. Choose the right equipment for your needs. And if the job is bigger than a simple DIY setup, bring in professionals who know what they are doing. Your property, your people, and your peace of mind are worth getting it right. Contact us today for expert security camera installation and reliable protection solutions.
Frequently Asked Questions (FAQs)
What is the first step in installing a security camera system?
Start with a site survey. Walk your property and identify every area that needs coverage doors, windows, driveways, and blind spots. Map out camera positions before buying equipment.
How many cameras do I need?
Most homes need 4 to 8 cameras. Small businesses typically need 8 to 16. The right number depends on the size of your property and the number of entry points.
Can I install security cameras myself?
Yes, for simple setups. Wireless IP cameras with cloud storage are designed for DIY. However, for larger properties or wired systems, professional installation gives better results.
What is the difference between DVR and NVR?
A DVR works with analog cameras via coaxial cable. An NVR works with IP cameras via ethernet. NVR systems offer higher resolution and more features.
Do outdoor cameras need special weatherproofing?
Yes. Look for cameras with an IP65 or higher rating. This protects against rain, dust, and temperature extremes.
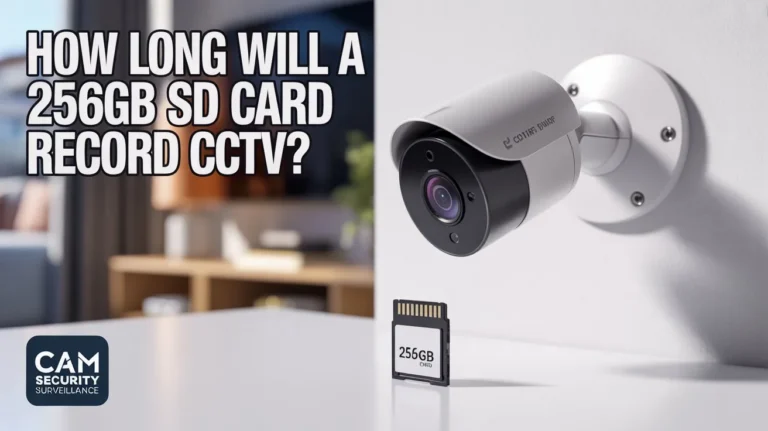
How long does camera footage stay stored?
Most systems store footage for 7 to 30 days before overwriting. Larger hard drives or cloud subscriptions can extend this period.
What resolution should I choose?
1080p is the current standard. For capturing fine details like license plates or faces at a distance, go with 4K.
Is wireless or wired better?
Wired is more reliable long-term. Wireless is easier to install. Choose based on your property type and how permanent the installation needs to be.