Installing security cameras is one of the smartest ways to protect your property, family, or business. Whether you want to deter crime, monitor activity in real time, or keep video records for later review, knowing how to install security cameras properly is essential. While the process may seem intimidating at first, with the right tools and information, you can perform a reliable and effective security camera system installation—even on your own.
This step-by-step guide covers everything from planning and equipment selection to mounting, connectivity, and ongoing maintenance. Whether you’re installing a wired or wireless system, you’ll walk away knowing how to install surveillance cameras with confidence.
Every successful install security camera system project begins with a solid plan. Walk around your property—home or business—and identify all potential points of vulnerability.
Here are key areas you should cover with your cameras:
- Front and back entrances
- Driveways and garages
- Rear doors or alleyway access
- Side gates or shared fences
- Ground-level windows
- Stairways and hallways (for indoor surveillance)
To install security cameras effectively, it’s not about the number of cameras—it’s about the positioning and field of view. Make sure your cameras overlap slightly in coverage and eliminate blind spots.
If you’re planning a wired security system installation, make sure there’s access to power outlets and paths for routing cables discreetly and safely. The planning stage is especially crucial for large homes or commercial properties.
Step 2: Choose the Right Cameras and Equipment
Selecting the right camera model depends heavily on what you’re monitoring, lighting conditions, and where you’re mounting them. Here are popular options for both indoor and outdoor use:
1. Dome Cameras
Ideal for indoor use. These cameras have a wide-angle view and are difficult to tamper with or redirect.
2. Bullet Cameras
Best for outdoor surveillance. They offer a long viewing range and are highly visible, often acting as a deterrent.
3. PTZ Cameras
These allow you to pan, tilt, and zoom remotely. Great for wide or open areas like parking lots or warehouses.
4. Wi-Fi Cameras
Perfect for small homes and renters. These are easy to install and configure via smartphone apps.
If you’re going for a wired security system installation, ensure your cameras, cables (coaxial or Ethernet), and DVR/NVR are compatible. Also, consider features like:
- Night vision
- Motion detection
- Two-way audio
- Waterproof housing
- Storage options (cloud vs local)
The better you match camera type to its application, the smoother your security camera system installation will be.
Step 3: Gather Tools and Prepare for Setup
Before you install security cameras, gather all necessary tools. Here’s what you’ll typically need:
- Power drill and drill bits
- Screwdriver set
- Screws, wall anchors, and mounting brackets
- Ladder (for outdoor or ceiling installs)
- Ethernet cable (for wired systems)
- Smartphone or tablet (for camera configuration)
- Pencil for marking positions
If you’re planning to install surveillance cameras with smart features, download the appropriate mobile apps beforehand. These apps guide you through pairing, adjusting camera angles, and enabling remote monitoring. Whether you’re doing a full-blown security camera system installation or adding a few Wi-Fi units, preparation is key.
Step 4: Install Security Camera System (Mount & Wire)
Once your plan is in place and tools are ready, it’s time to install security cameras physically. Start with determining the camera height and field of view.
A. Wireless Security Cameras
- Use the app to preview camera angles.
- Mount using the provided brackets and screws.
- Plug into power or insert batteries.
- Connect to Wi-Fi using your smartphone.
- Name and configure each camera inside the app.
B. Wired Security System Installation
- Drill holes for the camera bracket and cable routing.
- Run cables from each camera to the DVR or NVR.
- Use cable clips or conduits for safety and neatness.
- Mount cameras securely and adjust their angles.
- Power the cameras and test the feed from each one.
A reliable install security camera system process always includes real-time testing. Ensure each camera’s view is unobstructed, and check if any areas need coverage adjustments.
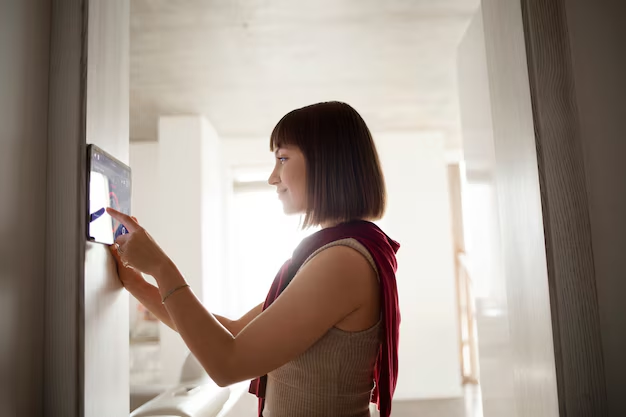
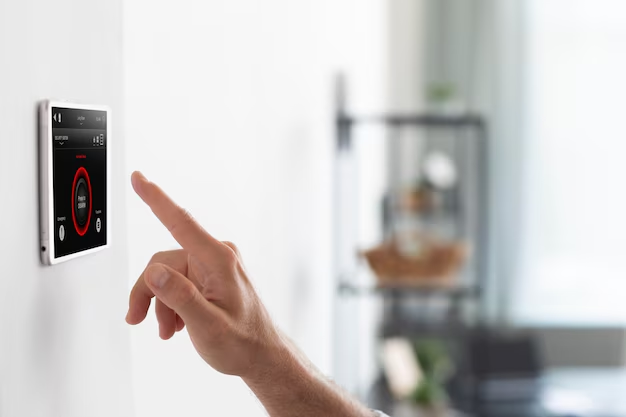
Step 5: Connect and Configure Your Security System
After mounting the units, you’ll need to finish the security camera system installation by syncing and optimizing your equipment.
Wireless Setup Includes:
- Connecting to your home security system indianapolis or business Wi-Fi
- Configuring motion detection zones
- Setting up cloud storage or local SD card backup
- Enabling push notifications for real-time alerts
For Wired Systems:
- Connect cameras to NVR/DVR and link to a monitor
- Adjust frame rates and resolution settings
- Set up a remote-view app for mobile access
- Create backup schedules
This part of the install surveillance cameras process is essential for full system functionality. Check if firmware updates are available and apply them to prevent bugs or vulnerabilities.
Step 6: Test and Maintain Your System Regularly
Proper maintenance ensures your cameras stay reliable over time. Here’s how to maintain your security camera system installation effectively:
- Lens Checks: Clean regularly to prevent blurry images
- Battery Levels: Recharge or replace batteries as needed
- Connection Health: Check signal strength (for wireless)
- Cable Integrity: Inspect wired systems for wear and tear
- Software Updates: Regularly update apps and firmware
Maintaining your system is just as important as learning how to install security cameras in the first place. Your footage is only as good as the system’s performance.
Ready to Install Security Cameras with Confidence?
Learning how to install security cameras gives you the power to protect what matters most—on your own terms. From planning and wiring to testing and maintaining, each step helps you build a robust and efficient system.
Whether you’re upgrading existing cameras or starting from scratch with a smart home security system indianapolis installation, the process doesn’t have to be complicated.
If you’d rather leave the technical work to professionals, Cam Security Surveillance is here to help with expert support, reliable products, and complete peace of mind. Reach out today and let us take care of your wired security system installation and more.
Final Thoughts
Installing security cameras is one of the most valuable investments you can make for your home or business. When done properly, it not only enhances your property’s security but also gives you peace of mind knowing you’re protected around the clock. From assessing vulnerable entry points to selecting the right camera types and carefully mounting and configuring your system, each step plays a crucial role in creating a reliable surveillance setup. Regular maintenance, timely updates, and proper system checks ensure your security solution remains effective for years to come. While many opt to install surveillance cameras on their own, the complexities of multi-camera systems or wired installations often require expert handling. That’s where trusted professionals come in. With trained technicians and quality equipment, you can ensure everything is done right the first time. Protect what matters most—safely, securely, and confidently—with professional support tailored to your specific security needs.
FAQs
1. What tools do I need to install security cameras?
To install security cameras, you will need a drill, screwdriver, measuring tape, level, cable strippers (for wired cameras), wire connectors, and a smartphone or computer for setup and monitoring.
2. Can I install security cameras myself?
Yes, you can install security cameras yourself with the right tools and a clear guide. However, if you’re unsure, you can always seek professional help.
3. How do I plan where to place my security cameras?
You should place cameras at entry points, driveways, parking areas, and any blind spots around your property to ensure complete coverage.
4. What’s the difference between wired and wireless security cameras?
Wired cameras are hardwired to your system and offer more stability, while wireless cameras connect via Wi-Fi and are easier to install but require a reliable internet connection.
5. How do I install wired security cameras?
To install wired security cameras, mount the camera brackets, run the cables to the DVR or NVR, connect to the power source, and test the system before sealing everything.


