Security cameras only protect you if they are installed correctly. A camera pointed at the wrong angle, mounted too high, or connected poorly is basically useless. Most break-ins happen at front doors, side gates, and garages. Knowing where and how to place cameras makes all the difference between footage that helps and footage that does not.
This guide walks you through exactly how to install security cameras the right way, from picking the right type to testing your system after setup. Whether you are doing it yourself or hiring help, you will know what a good installation looks like before you spend a dollar.
Types of Security Cameras Before Installation
How to Install Security Cameras: A Complete Step-by-Step Guide
Security cameras only protect you if they are installed correctly. A camera pointed at the wrong angle, mounted too high, or connected poorly is basically useless. Most break-ins happen at front doors, side gates, and garages. Knowing where and how to place cameras makes all the difference between footage that helps and footage that does not.
This guide walks you through exactly how to install security cameras the right way, from picking the right type to testing your system after setup. Whether you are doing it yourself or hiring help, you will know what a good installation looks like before you spend a dollar.
Types of Security Cameras Before Installation
Before you install anything, you need to pick the right camera type. The wrong camera in the wrong spot fails no matter how well you mount it. At Cam Security Surveillance, we see this mistake more than any other.
Bullet cameras are long and cylindrical. They are great for long driveways, parking lots, and areas where you need focused range. They are visible, which also works as a deterrent.
Dome cameras have a wide viewing angle and a low profile. They work well indoors, in retail spaces, and at entryways. Harder to tamper with because the lens direction is not obvious.
PTZ cameras (pan-tilt-zoom) can move and track motion. These are used in large commercial spaces where one camera needs to cover a wide area actively.
Turret cameras sit flush on a surface and offer a ball-and-socket design. They are easier to aim and resist IR reflection better than dome cameras at night.
Doorbell cameras cover front doors and are the most common home choice. They combine a camera, two-way audio, and motion alerts in one unit.
Indoor vs outdoor: Always check the IP rating. Outdoor cameras need at least IP66. Anything less risks water damage in rain or humidity.
Tools and Equipment Needed
Getting the tools ready before you start saves a lot of frustration. Here is what you need for a standard wired security camera system installation:
- Power drill with masonry and wood bits
- Screwdrivers (flathead and Phillips)
- Fish tape or cable snake (for running cables through walls)
- PoE switch or NVR with built-in PoE ports
- Cat6 Ethernet cable (for IP cameras)
- RG59 coaxial cable (for analog cameras)
- Cable clips or conduit for outdoor runs
- Wire stripper and crimping tool
- Ladder
- Voltage tester
- Waterproof junction boxes for outdoor connections
- HDMI cable (to connect NVR to a monitor)
For wireless systems, the list is shorter. But you still need a drill, ladder, and a strong Wi-Fi signal confirmed at each mounting location before you start.
Planning the Camera Layout
This step matters more than most people realize. Poor planning is the number one reason security systems have blind spots.
Start outside. Walk around your property and identify every entry point. Front door, back door, side gates, garage, ground-floor windows. These are your priority zones.
Think about angles, not just locations. A camera should capture faces at entry points, not the top of heads. Mount cameras between 7 and 9 feet high for the best angle. Too high and you lose facial detail. Too low and cameras are easy to tamper with.
Check lighting conditions. Cameras facing west or east will deal with direct sunlight at certain times of day. Position cameras so the sun is behind them or to the side, not directly in the lens.
Map your cable runs. For wired systems, plan the shortest path from each camera back to your NVR. Every cable bend and wall penetration adds time. Mark your route before drilling anything.
Use overlapping coverage. Two cameras that cover the same zone from different angles are far more valuable than two cameras covering completely separate areas. If one angle is blocked, the other still captures the event.
Dead zones to avoid: corners where two walls meet at a 90-degree angle, areas behind large trees or fixtures, and low-light spots with no lighting source nearby.
Step-by-Step Installation Process
Here is how to install security cameras from start to finish for a wired IP system.
Step 1: Mount the NVR
Place your NVR in a secure, ventilated location. A locked cabinet near your router is ideal. Connect it to your router with an Ethernet cable and plug it into power. Do not hide it somewhere that traps heat.
Step 2: Run Your Cables
Run Cat6 cable from the NVR location to each camera position. Use a fish tape to pull cables through walls. For outdoor runs, use conduit to protect cables from weather and physical damage. Secure cables with clips every 18 to 24 inches.
Step 3: Drill Mounting Holes
At each camera location, drill a hole for the cable to pass through. Angle the hole slightly downward from inside to outside. This prevents water from running along the cable into the wall.
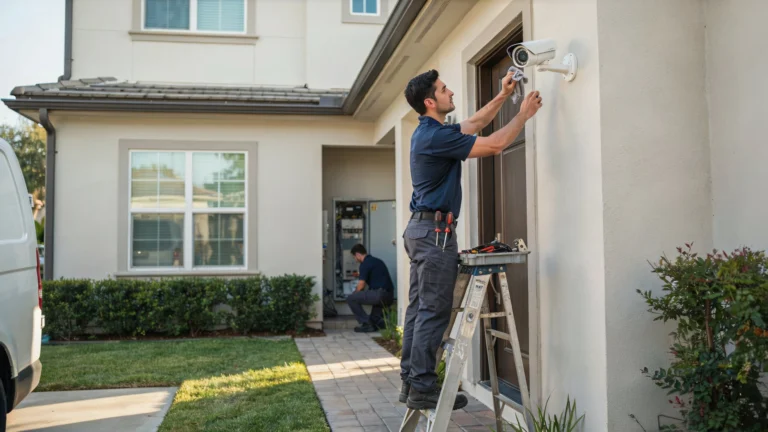
Step 4: Mount the Camera Bracket
Attach the mounting bracket to the surface using screws and wall anchors. On brick or concrete, use masonry anchors. Pull the cable through the bracket before tightening.
Step 5: Connect the Camera
Strip the cable end and connect it to the camera’s PoE port or terminal block. For PoE cameras, one Cat6 cable handles both power and data. For analog cameras, you need a separate power cable alongside the coaxial cable.
Step 6: Seal Outdoor Connections
Apply waterproof silicone sealant around any outdoor cable entry point. This prevents water from entering walls over time.
Step 7: Attach the Camera to the Bracket
Snap or screw the camera body onto the bracket. Aim the lens toward your target zone before tightening fully. You will fine-tune the angle after connecting to the monitor.
Step 8: Connect All Cameras to the NVR
Plug each cable into the NVR’s PoE ports. Power on the NVR and connect it to a monitor via HDMI.
Step 9: Configure the NVR
Follow the setup wizard to set the time, date, recording schedule, and motion detection zones. Set the system to record continuously or on motion, depending on your preference and storage capacity.
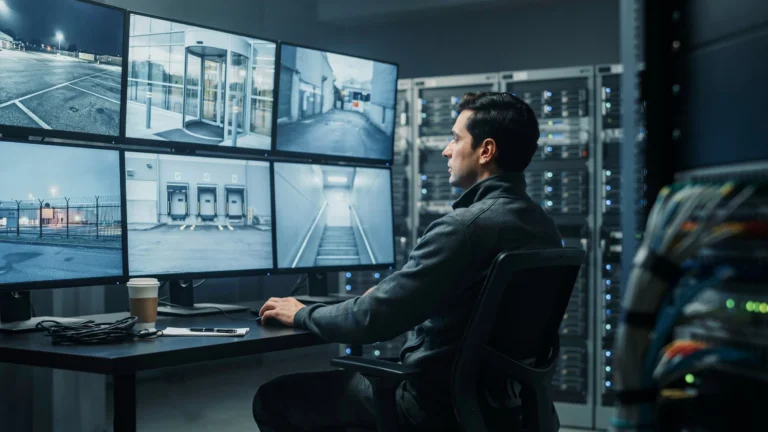
Connecting Cameras to Mobile and PC
Once the NVR is running, remote access is the next step.
For PC access: Most NVR brands offer a desktop client. Download it, enter your NVR’s local IP address, and log in with your credentials. You can view live feeds and review footage from your desk.
For mobile access: Download the manufacturer’s app (Hikvision, Dahua, Reolink, etc.). Go to your NVR’s network settings and enable remote access or P2P. Scan the QR code from the NVR menu using the app. You are connected.
Port forwarding: If you want direct remote access without a P2P cloud relay, set up port forwarding on your router. Forward port 8000 and 554 (for RTSP streaming) to your NVR’s local IP. This gives you direct, faster access but requires a static IP or DDNS setup.
Security tip: Change the default admin password on your NVR immediately. Default passwords are publicly known and are one of the most common ways camera systems get hacked.
Testing the System
Never skip testing. A camera that looks installed is not the same as a camera that works.
Check every camera angle. Open a live view and walk through each camera’s field of view. Look for obstructions, poor angles, or areas the camera misses.
Test night vision. Turn off the lights or test at dusk. Confirm the IR LEDs activate and the image stays clear at the range you need.
Trigger motion detection. Walk through each camera’s motion zone. Confirm alerts fire and recording starts correctly.
Review a recorded clip. Pull up footage from 30 minutes ago. Confirm the image is sharp, the timestamp is correct, and the file saves without error.
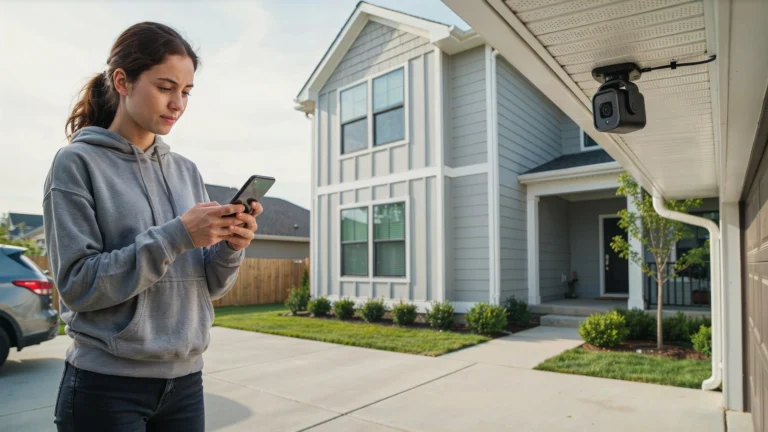
Test remote access. Open your phone app on mobile data (not your home Wi-Fi). Confirm you can see live footage from outside the network.
Check storage. Confirm the NVR is writing to the hard drive and estimate how many days of footage fit before it overwrites. Adjust the recording schedule if needed.
Common Installation Mistakes to Avoid
These are the errors that show up again and again, even in professional jobs.
Mounting too high. Cameras above 10 feet capture roof lines, not faces. Keep cameras between 7 and 9 feet.
Pointing cameras into the sun. Direct sunlight washes out the image. Test your angle at the time of day when light is strongest.
Using the wrong cable outdoors. Indoor-rated cables degrade quickly outside. Use outdoor-rated Cat6 with UV-resistant jacketing.
No cable protection. Exposed cables on exterior walls get chewed by animals, cut by intruders, or cracked by UV exposure. Always use conduit outdoors.
Skipping the sealant. One heavy rain can push water into an unsealed wall penetration. Always seal outdoor holes.
Default passwords. Leaving factory credentials on your NVR is a major security risk. Change them on day one.
Not labeling cables. If you ever need to troubleshoot, unlabeled cables turn a 10-minute fix into an hour of guessing.
Forgetting IR reflection. Dome cameras mounted near glass or white walls bounce IR light back into the lens at night, creating a washed-out image. Test night vision before finalizing placement.
Maintenance After Installation
A security camera system is not a set-and-forget setup. Regular maintenance keeps it reliable.
Clean lenses every 3 months. Dust, pollen, and spider webs reduce image clarity over time. Use a microfiber cloth and lens-safe cleaner.
Check cable condition twice a year. Look for cracking, fraying, or animal damage on outdoor runs. Catch problems before they cause a full camera failure.
Update firmware. Camera and NVR manufacturers release firmware updates that patch security vulnerabilities and fix bugs. Check for updates every 6 months.
Verify storage health. NVR hard drives fail without warning. Check drive health in the NVR’s system settings quarterly. Replace drives that show errors before they fail completely.
Test motion detection after any landscaping changes. New bushes, fences, or structures can block zones or create false triggers. Re-test after any changes to your property.
Review camera angles seasonally. Trees and shrubs grow. What was a clear view in spring may be blocked by foliage in summer. Adjust angles as needed.
When to Hire a Professional Installer
DIY installation works well for simple setups. But some situations call for a professional.
You have a large property. Homes over 3,000 square feet or commercial buildings need a designed coverage plan, not guesswork.
You need wired cameras in finished walls. Fishing cables through insulated, drywalled walls without damaging anything requires experience and proper tools.
You need license plate recognition or advanced analytics. These require specific camera placement, focal length calculations, and system configuration that goes beyond basic setup.
Your property has complex access points. Multiple floors, outbuildings, parking lots, and loading areas need an engineered system layout.
You want legal-grade footage. Businesses that rely on camera footage for liability or insurance claims need a system installed and documented by a certified professional.
If you are in Indiana and need expert help, Cam Security Surveillance specializes in professional home security systems Indianapolis residents and business owners trust. Our team handles the layout, installation, configuration, and ongoing support so your system works the first time and keeps working.
Do not guess with your security. One missed camera angle during an incident is a problem you cannot undo.
Benefits of Proper Installation
Getting the install right from day one pays off in real ways.
Full coverage with no blind spots. A properly planned install leaves no obvious gaps for someone to exploit.
Better footage quality. Correct angles, lighting, and lens choices produce sharper images that are actually useful in investigations.
Longer system lifespan. Proper cable protection, sealed connections, and correct power supply extend camera life by years.
Lower maintenance costs. Systems installed right have fewer failures, fewer service calls, and fewer replacement parts.
Peace of mind. Knowing your system was installed correctly means you trust it when something actually happens.
Conclusion
Knowing how to install security cameras properly is the difference between a system that genuinely protects you and one that just looks like it does. Pick the right camera type, plan your layout carefully, run cables correctly, and test everything before you call it done.
If the job is bigger than a few cameras or involves a commercial space, bring in a professional. The cost of getting it wrong is always higher than the cost of getting it right.
The right security system is the one that works when you need it most. Contact us today and let Cam Security Surveillance help you find it.
FAQs
How difficult is it to install security cameras yourself?
Basic wireless cameras are easy to install in a few hours. Wired systems with multiple cameras take more planning, tools, and time. If you are not comfortable running cables through walls, hire a professional.
How high should security cameras be mounted?
Between 7 and 9 feet is the standard for most locations. This height captures facial detail, keeps cameras out of easy reach, and provides a good downward angle.
Can I install security cameras without drilling?
Yes, for wireless cameras. Some mount with adhesive strips or magnetic bases. However, these are less stable and more vulnerable to tampering than screwed mounts.
What cable is best for security camera system installation?
Cat6 Ethernet cable is the standard for IP and PoE cameras. For analog systems, RG59 coaxial cable is used. Always use outdoor-rated cable for any exterior runs.
How do I install surveillance cameras to record 24/7?
Set your NVR to continuous recording mode. Make sure you have enough hard drive storage. A 4TB drive with 8 cameras recording at 1080p covers roughly 10 to 14 days of continuous footage.
Do security cameras need Wi-Fi to work?
Wired IP cameras connected to a local NVR do not need Wi-Fi to record. They only need an internet connection for remote viewing and cloud backup. Wireless cameras do require Wi-Fi.
How do I know if my installed security camera placement is correct?
Walk through the camera’s field of view while watching the live feed. Check for blind spots, confirm night vision works, and verify motion detection triggers reliably at the distances you need.